The Author Helper Suite Help – Setting Up Twitter
In order to get The Author Helper Suite connected to your Twitter account, you have to set up a Twitter Application. That means you need to register for their Developer Program.
Don’t worry, it’s free. It just takes a little time to walk through the step-by-step stuff.
You should be able to set it all up in about 10-15 minutes, though.
Step 1 – The Twitter Developer Portal
The first thing you’ll need to do is make sure you’re logged into Twitter, under the account you want to use for auto-tweeting.
Once you’ve done that, jump to the following URL: https://developer.twitter.com/
Then click on the “Sign Up” button to get started.
Step 2 – Fill out the application
This section is a snap. Just fill out the four fields in the center, as instructed by the image below.
Step 3 – Accept Twitter’s Terms of Service
Anytime you sign up to anything, it’s always recommended that you read the fine print. Once you’re done doing that, check the box accepting Twitter’s terms and submit your application.
Step 4 – Your App Name
Every application on Twitter requires a unique name. We recommend using your author name followed by “Tweetbot,” but you may call it whatever you want.
Step 5 – Getting your API Keys
Without getting too technical, API standard Application Programmers Interface. It’s just a fancy way of saying that Twitter will let you do stuff on their system if a programmer requests particular items according to Twitter’s designs.
Not to worry, though. We’ll be making those calls on your behalf. You just need to provide us the Twitter details to allow that.
In order for that to happen, however, you’ll need to copy a bunch of keys from Twitter that you’ll be eventually pasting into The Author Helper Suite.
Please save all these keys in a safe location, and be sure to give each key a name that identifies what it’s for. You can use the field name Twitter provides to know what to call each item. Example: The first key on the next screenshot is “API Key”.
You’ll note that I’ve blurred out portions of my keys for security reasons. Anyone who has access to your keys can tweet on your behalf, so be careful with them.
Step 6 – Confirming you’ve saved the keys
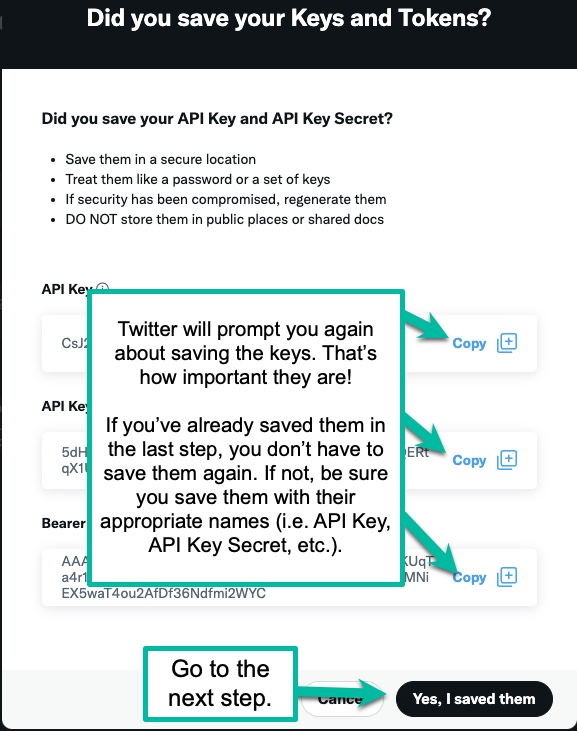
Twitter will pester you to make sure you’ve saved those keys. It’s kind of a big deal, too, because if you lose your keys, you’ll have to reset them, meaning you’ll have to replace them anywhere they’re being used.
Step 7 – The simplest step of the process
You’re not going to need the tour, but you can always do it if you want. For our purposes, however, you can just skip it.
Step 8 – Accessing your App
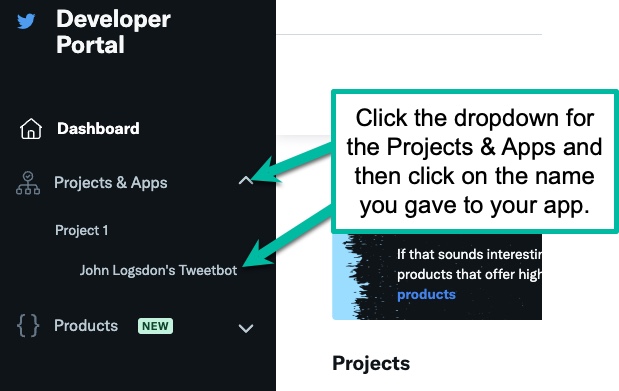
There are two ways to do this, but we’re just going to go with the left-side menu option.
Choose the dropdown for the Projects & Apps section, and then click on the name of your App.
Step 9 – Your App Project Page & Authentication Settings
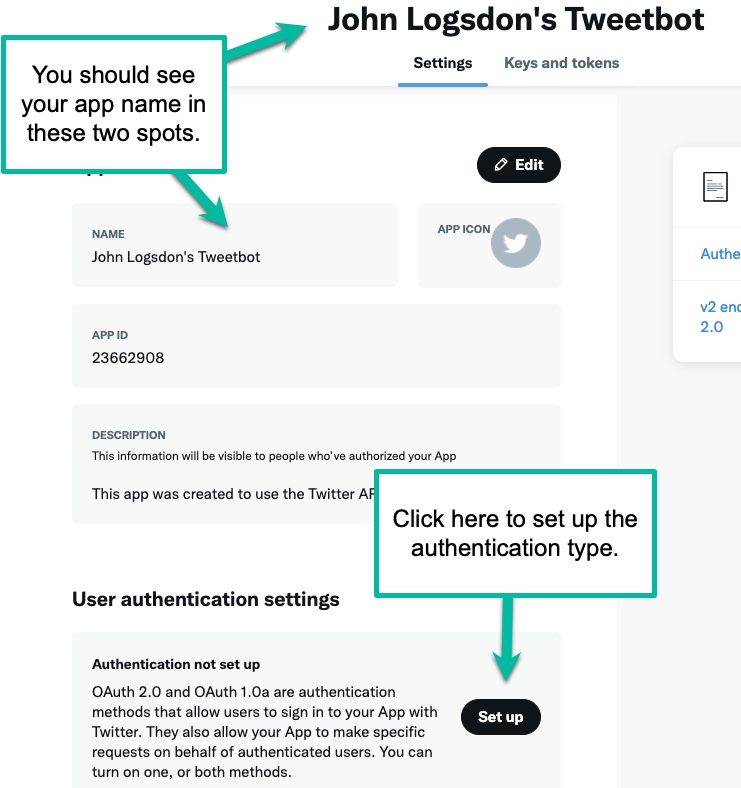
You should now see your App name at the top of the page. It’ll also show directly below it.
If you look under the “User authentication settings” area, you’ll see an button that says “Set up.”
Click that button.
Step 10 – Updating your User Authentication Settings
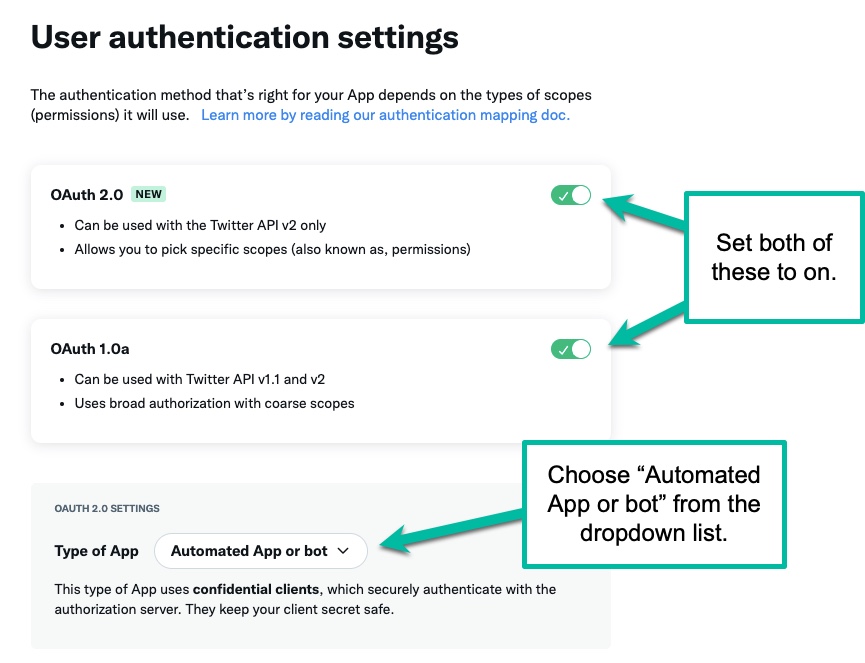
First up, turn on the options for both OAuth 2.0 and OAuth 1.0a.
Then, under the OAuth 2.0 Settings area, change the Type of App to “Automated App or bot.”
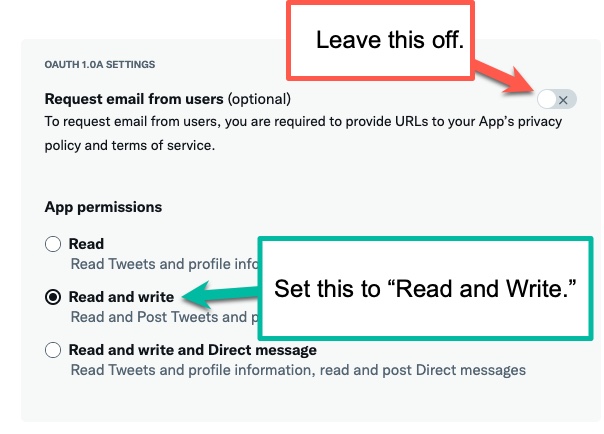
Scroll down a bit and you’ll see the OAuth 1.oa Settings section.
Be sure to leave the “Request email from users” option off.
Under the “App Permissions” area, choose the “Read and write” option.
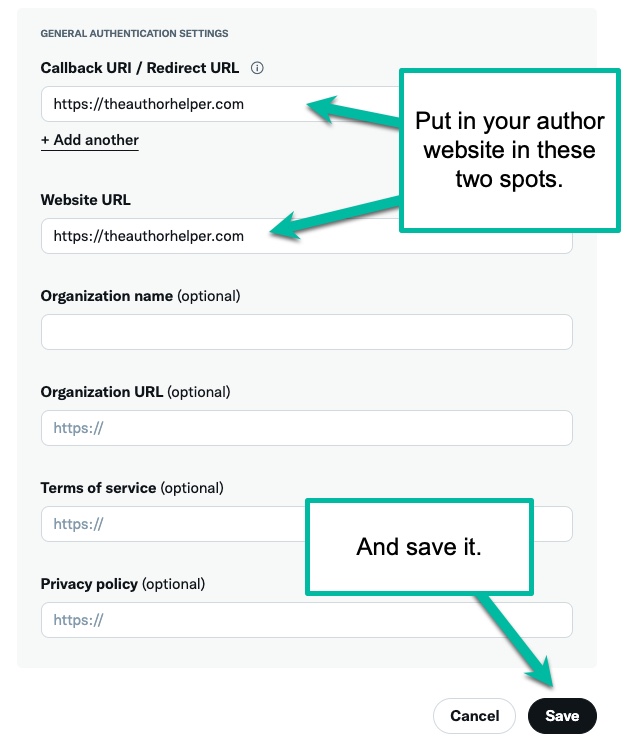
Scroll down a little further and you’ll see a form requesting info from you for the App.
You only need to fill in the top two fields. Simply use your author website for both.
Then click the button to save your work.
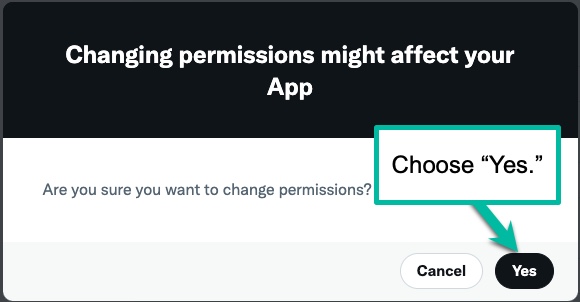
Twitter’s going to popup a window asking if you really want to make those changes to your App.
Choose the “Yes” button.
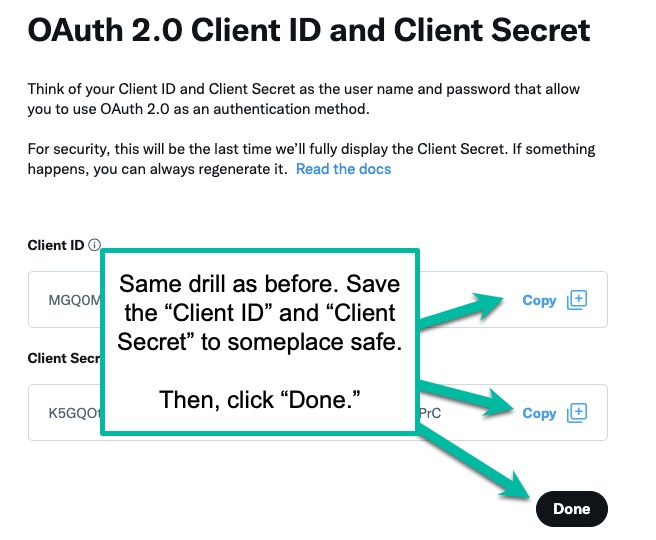
As soon as you click the “Yes” button, you’ll get a new window asking you to copy even more keys!
Note there are even more keys coming later.
Twitter likes keys. 🙂
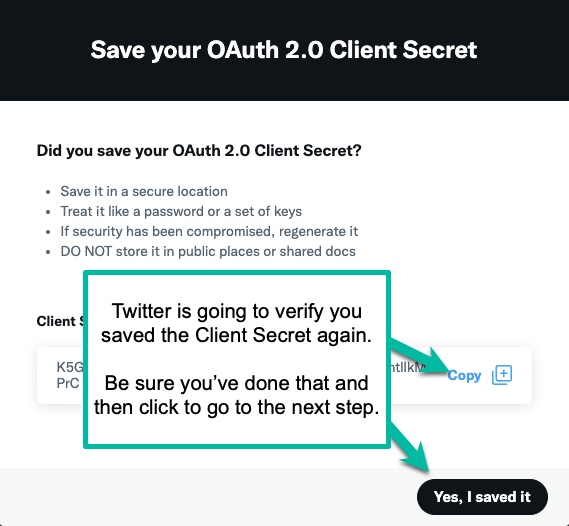
Copy them just as you did with the ones from earlier, naming them accordingly.
They’re going to pester you again about the keys you were just supposed to copy.
They do this because if you don’t save a key, you can’t reaccess it. You’ll have to regenerate it, meaning you lose the original key.
In other words, they don’t want you yelling at them about this, so they’re making sure they tell you over and over again how important it is for you to copy those keys.
Step 11 – Generating your Access Token and Secret
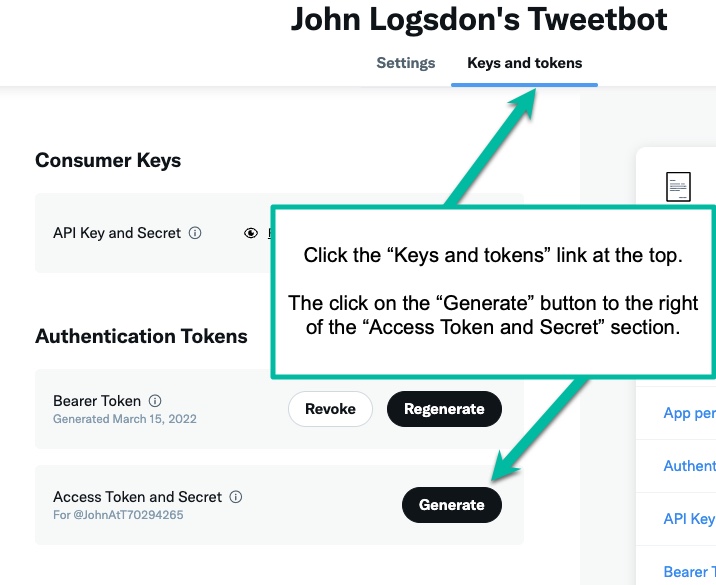
Click on the “Keys and tokens” link at the top of the App page.
Then, click on the “Generate” button next to the “Access Token and Secret” section.
Step 12 – More Key Copying (Yay!)
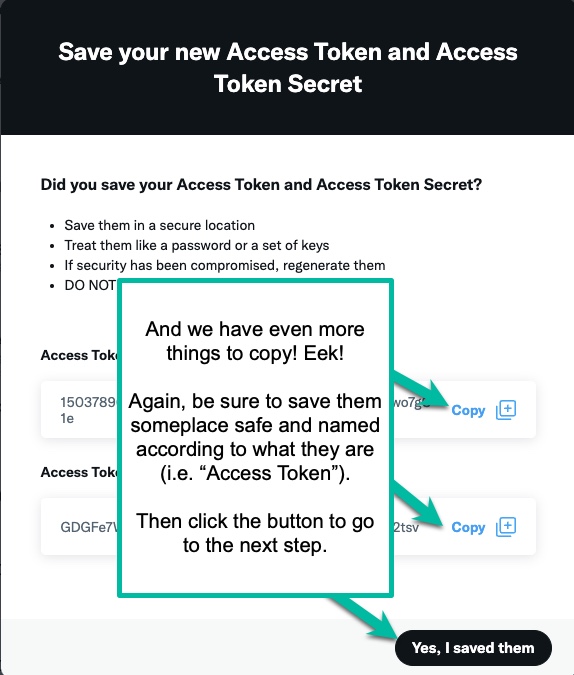
You know the drill. Copy those keys and save them under a name that fits.
Then click that you saved them.
Step 13 – Pasting your Keys to your AHS Account
Log in to your Author Helper Suite account and choose the “ReaderLinks” menu item. Under there, you should see the “TwitterTool” option.
Click that and then select the API Settings tab and fill in the fields.
Note that my fields are blurred here for security reasons.
Step 14 – You’re now ready to start using the AHS TwitterTool!
Assuming you’ve input all the keys correctly, you should now be able to create your first tweet, add it to AHS and then star it into rotation.
Please see the “Working with the AHS TwitterTool” help topic for help using the system.


