Welcome to ReaderLinks!
Setting up ReaderLinks for the first time?
The steps below will get you up and running in no time.
BEFORE you import your sales data, create an author/pen name for each name you publish under so that your data will appear under the correct name.
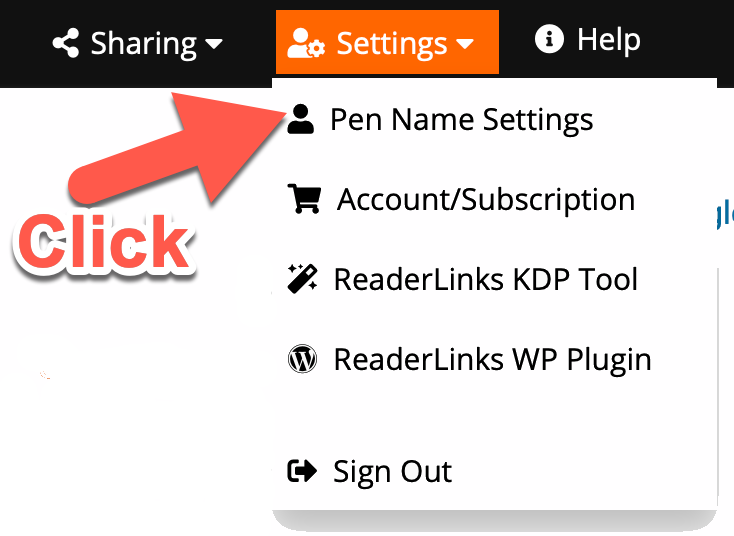
1. From the settings menu, select Pen Names Settings.
2. Select the General tab.
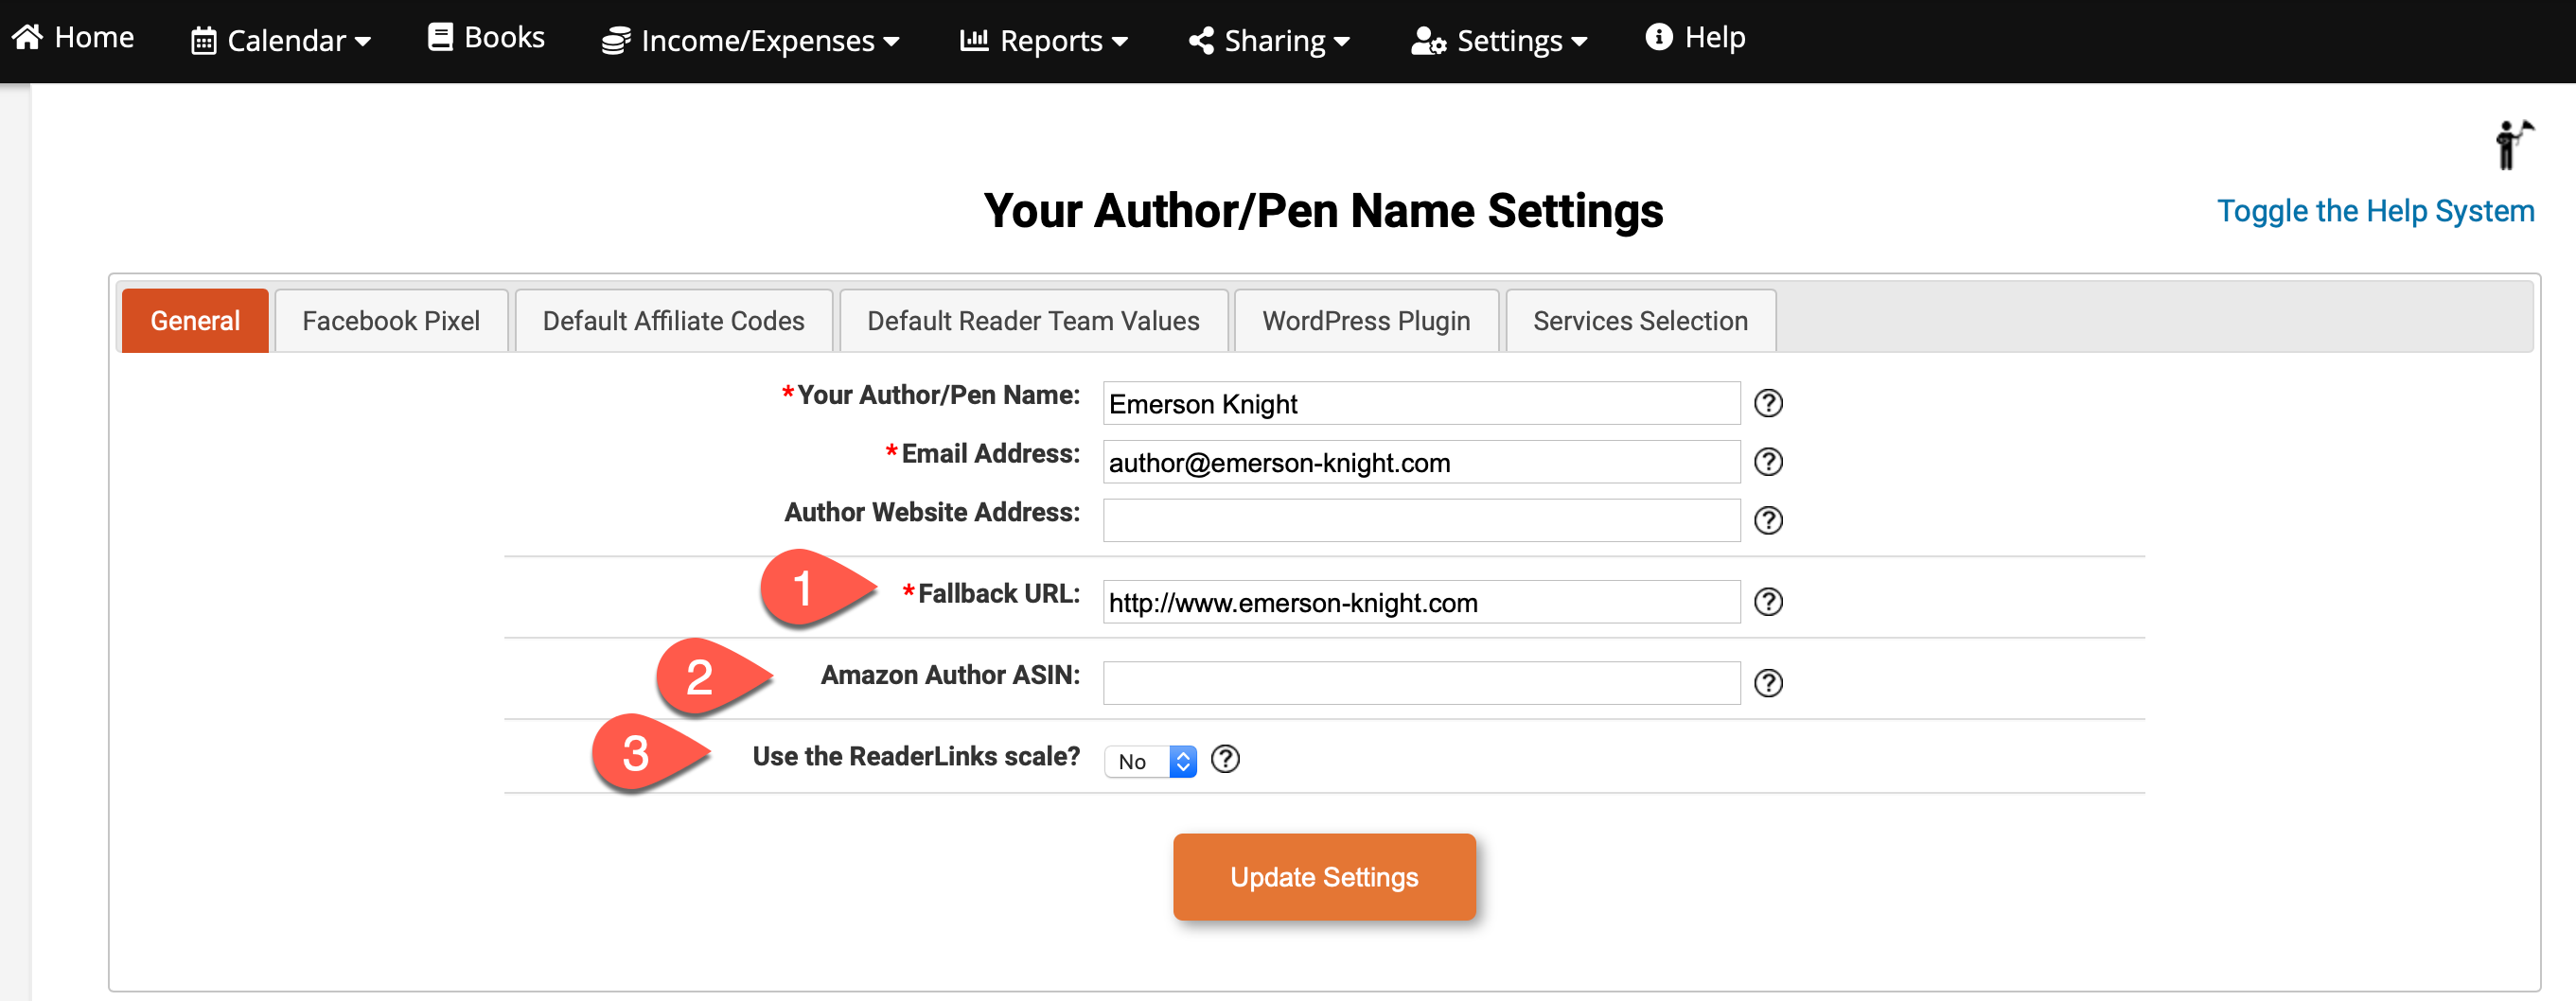
Most of the fields are self-explanatory. A few fields of note are explained below.
- Fallback URL: In the unlikely even that one of your links is broken, the user will be sent to your fallback link. For example, your fallback page could be a special error page of your own design, or your home page.
- If you need help finding your author ASIN, see step 2.1 below.
- Readerlinks offers a fun and customizable earnings scale, based on your sales data, to help you set and achieve goals.
2.1 Find your Amazon author ASIN. In your browser, go to your Amazon author page. Your author ASIN appears in the page address.
Example A.

Example B

3. Select the Facebook Pixel tab.
- Support for the ReaderLinks WordPress plug-in has been discontinued, and the plug-in is no longer available for download.
- Enter your Facebook pixel here, if you have one. A pixel is not required, but recommended.
4. Select the Default Affiliate Codes tab.
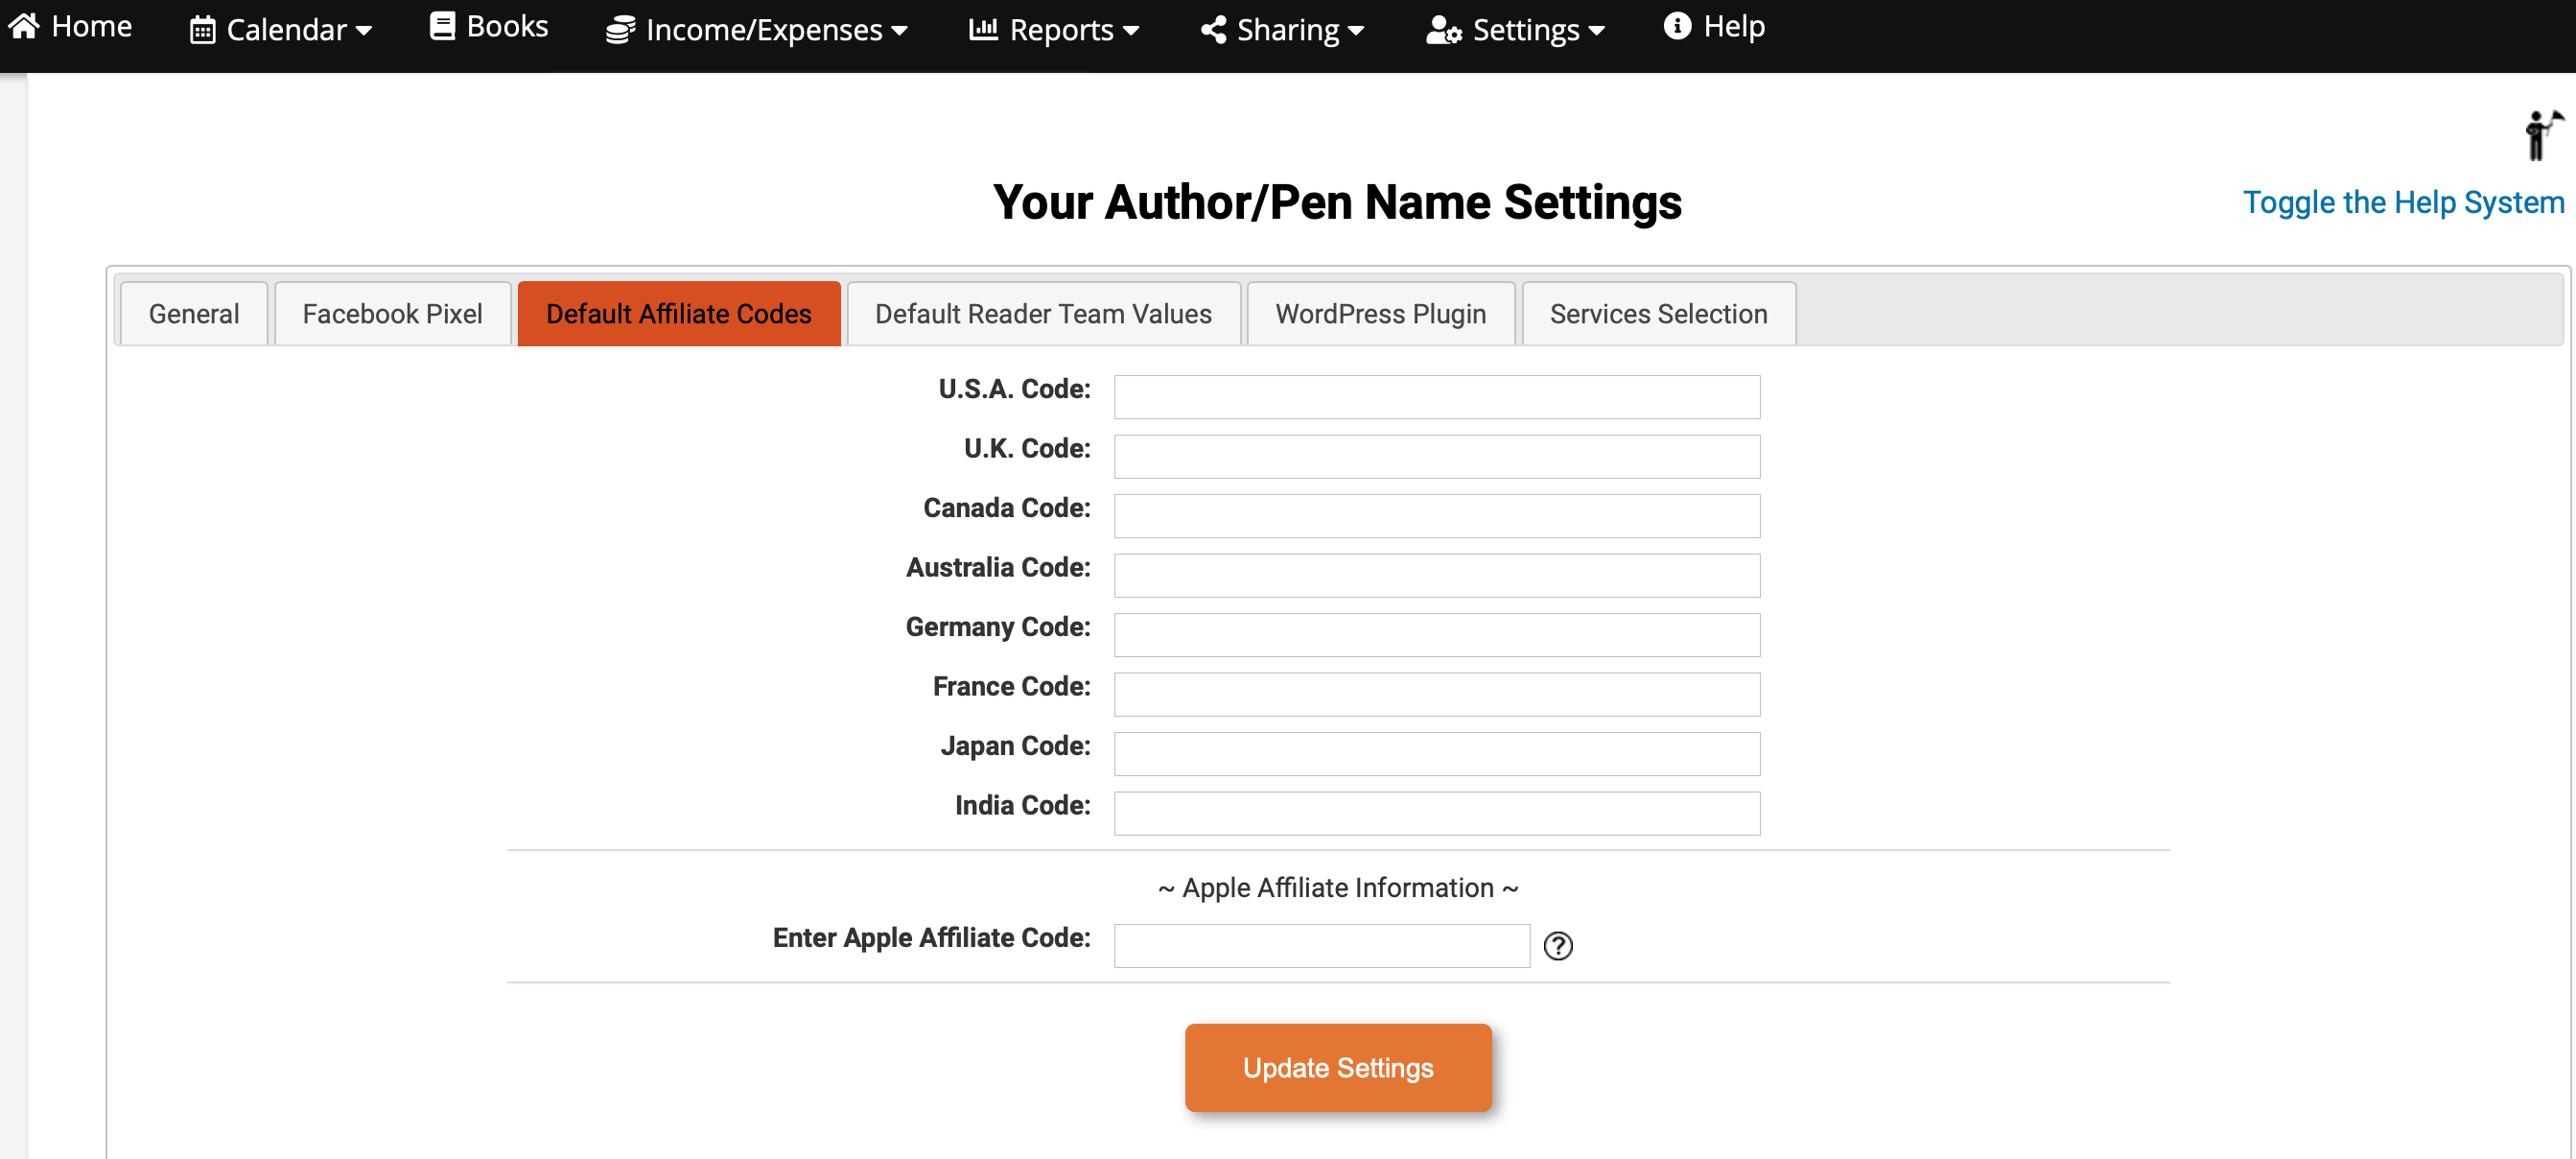
Add your default affiliate codes for each market here. All of your links that you create in Readerlinks will include your appropriate affiliate code as it appears on this page. Don’t worry! You can update, change, or remove your codes from this page at any time. Your existing links will always utilize the most current code information.
5. Select the Default Reader Team Values Tab.
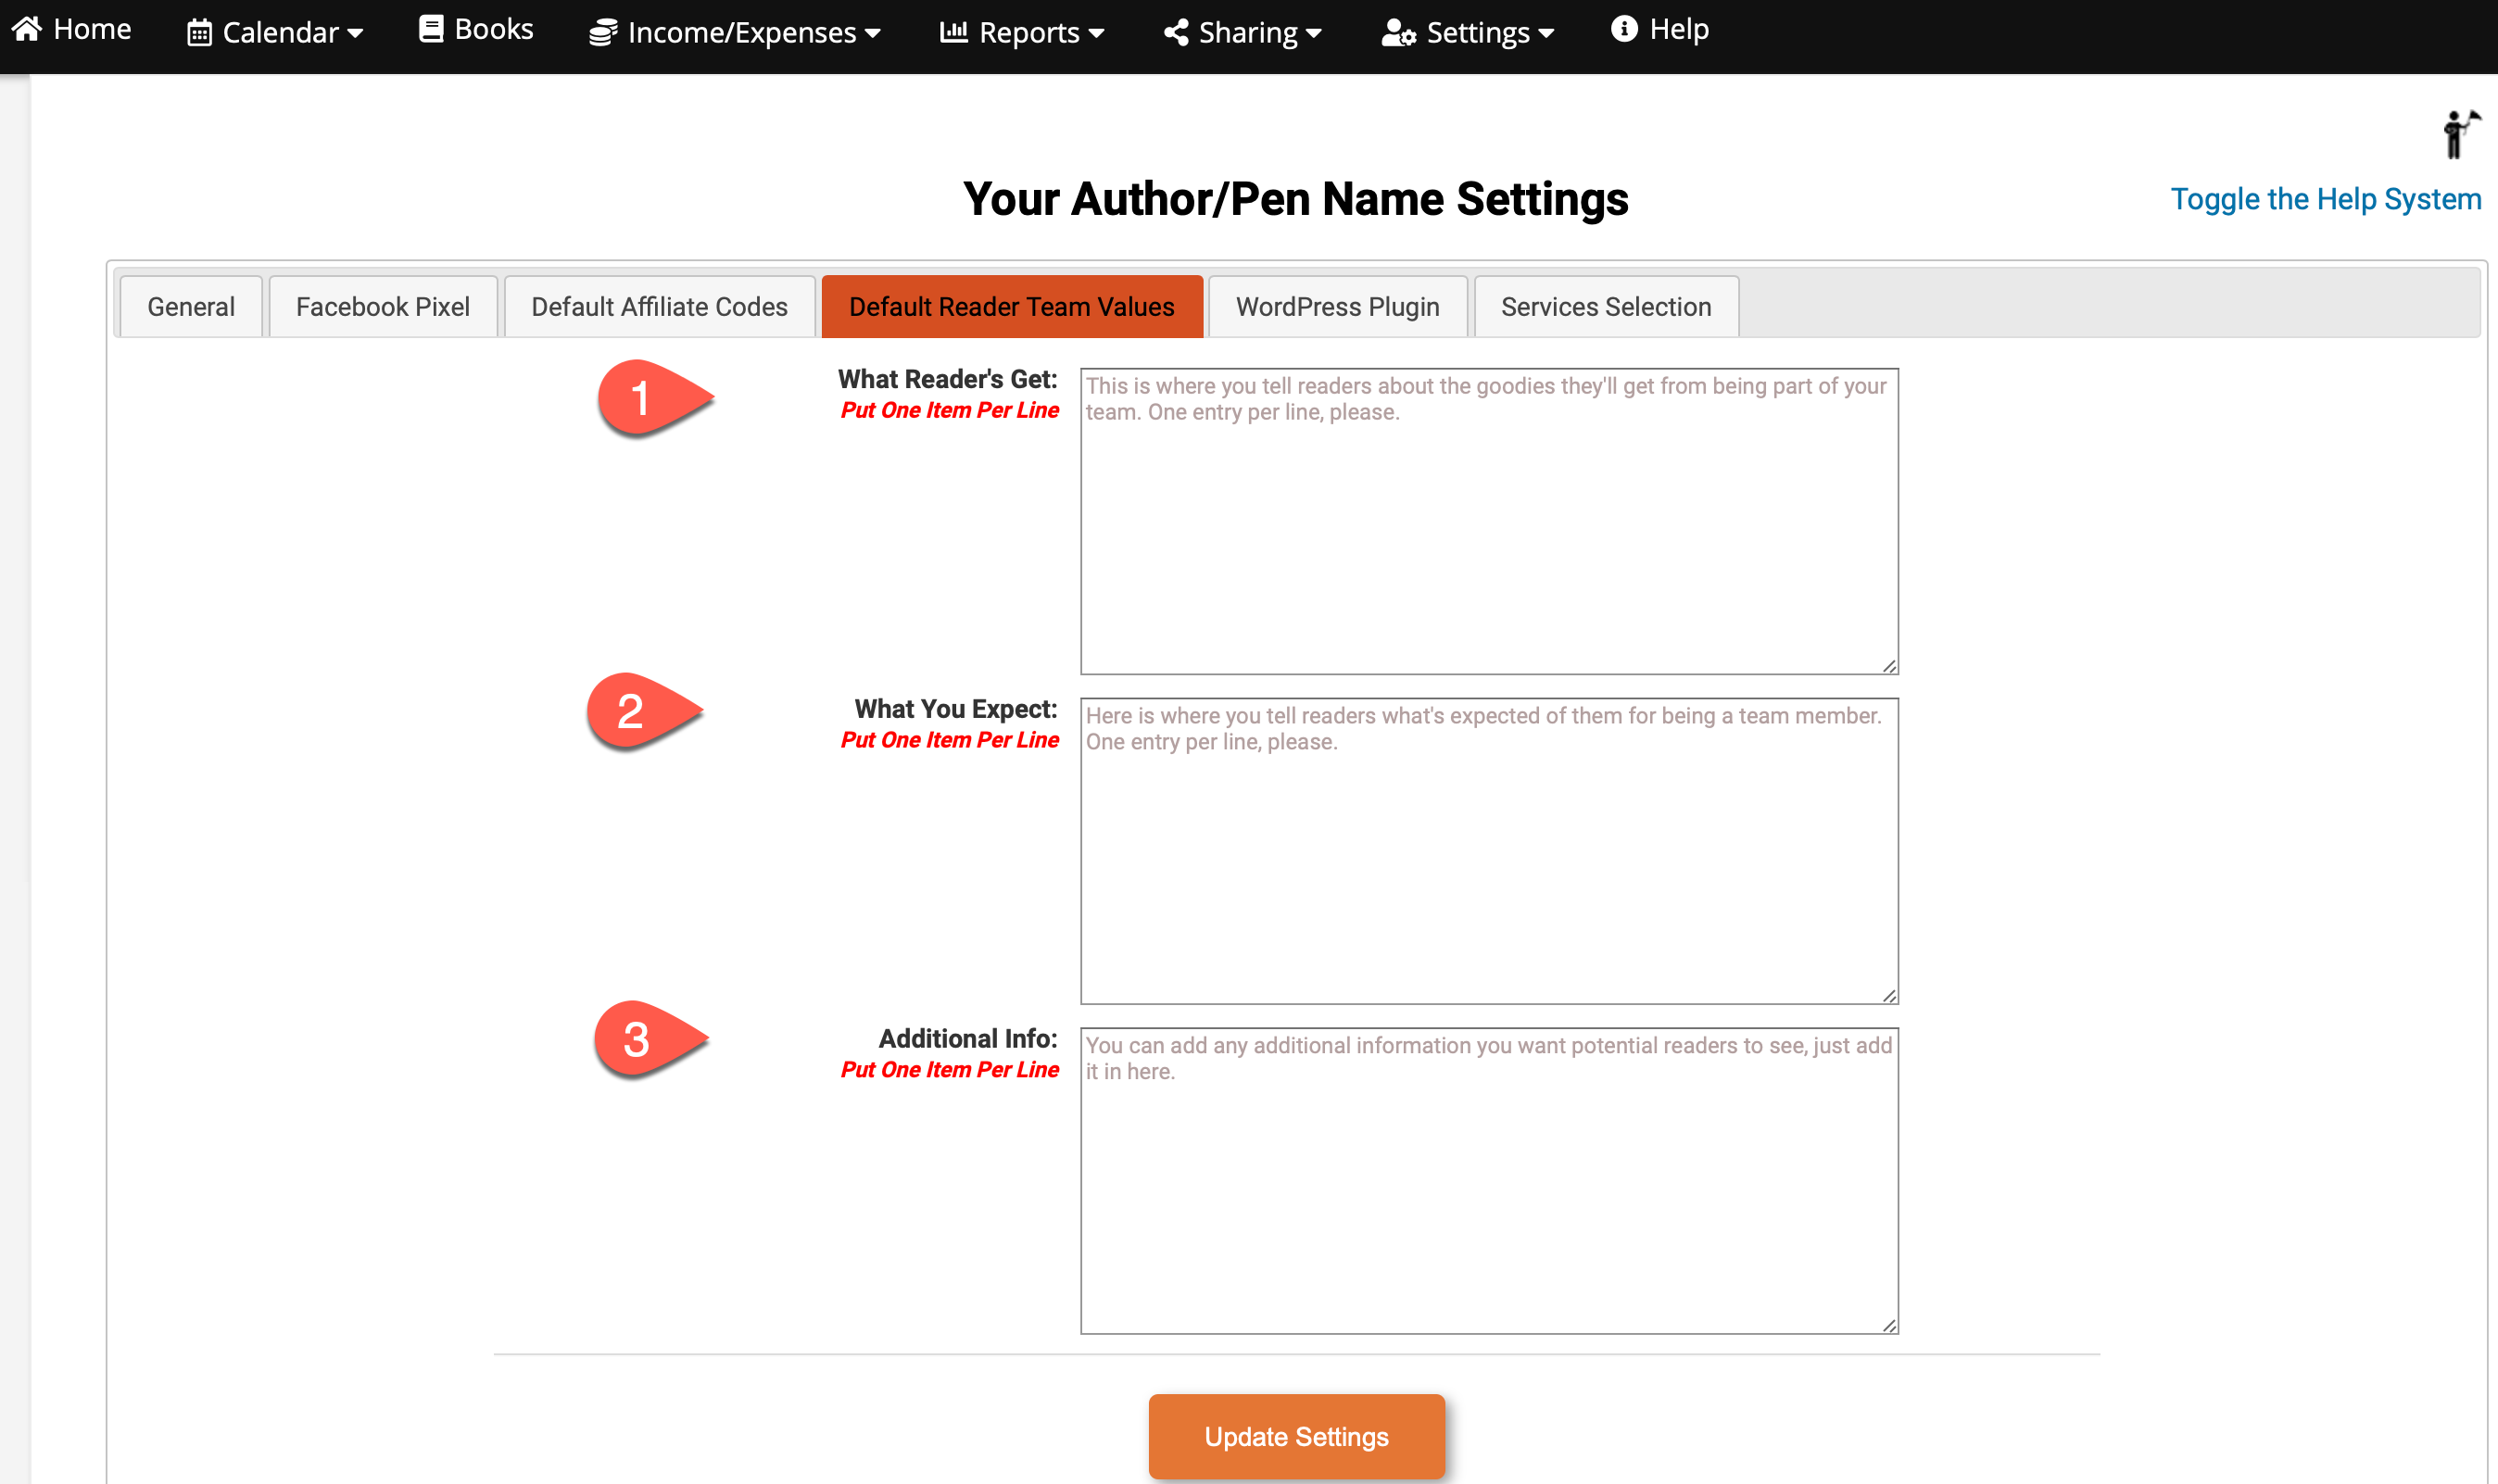
The information here will be presented to readers who inquire about joining your reader teams. You can update this information at any time. One entry per line, please!
- This is where you tell readers about the goodies they’ll get from being part of your reader team.
- Let the readers know what is expected of them as members of your reader team.
- Anything else you you want to tell your potential team member goes here.
6. On the WordPress Plugin tab, leave the Using Plugin setting as ‘No.” The WordPress Plugin is being phased out.

7. Select the Services Selection tab.
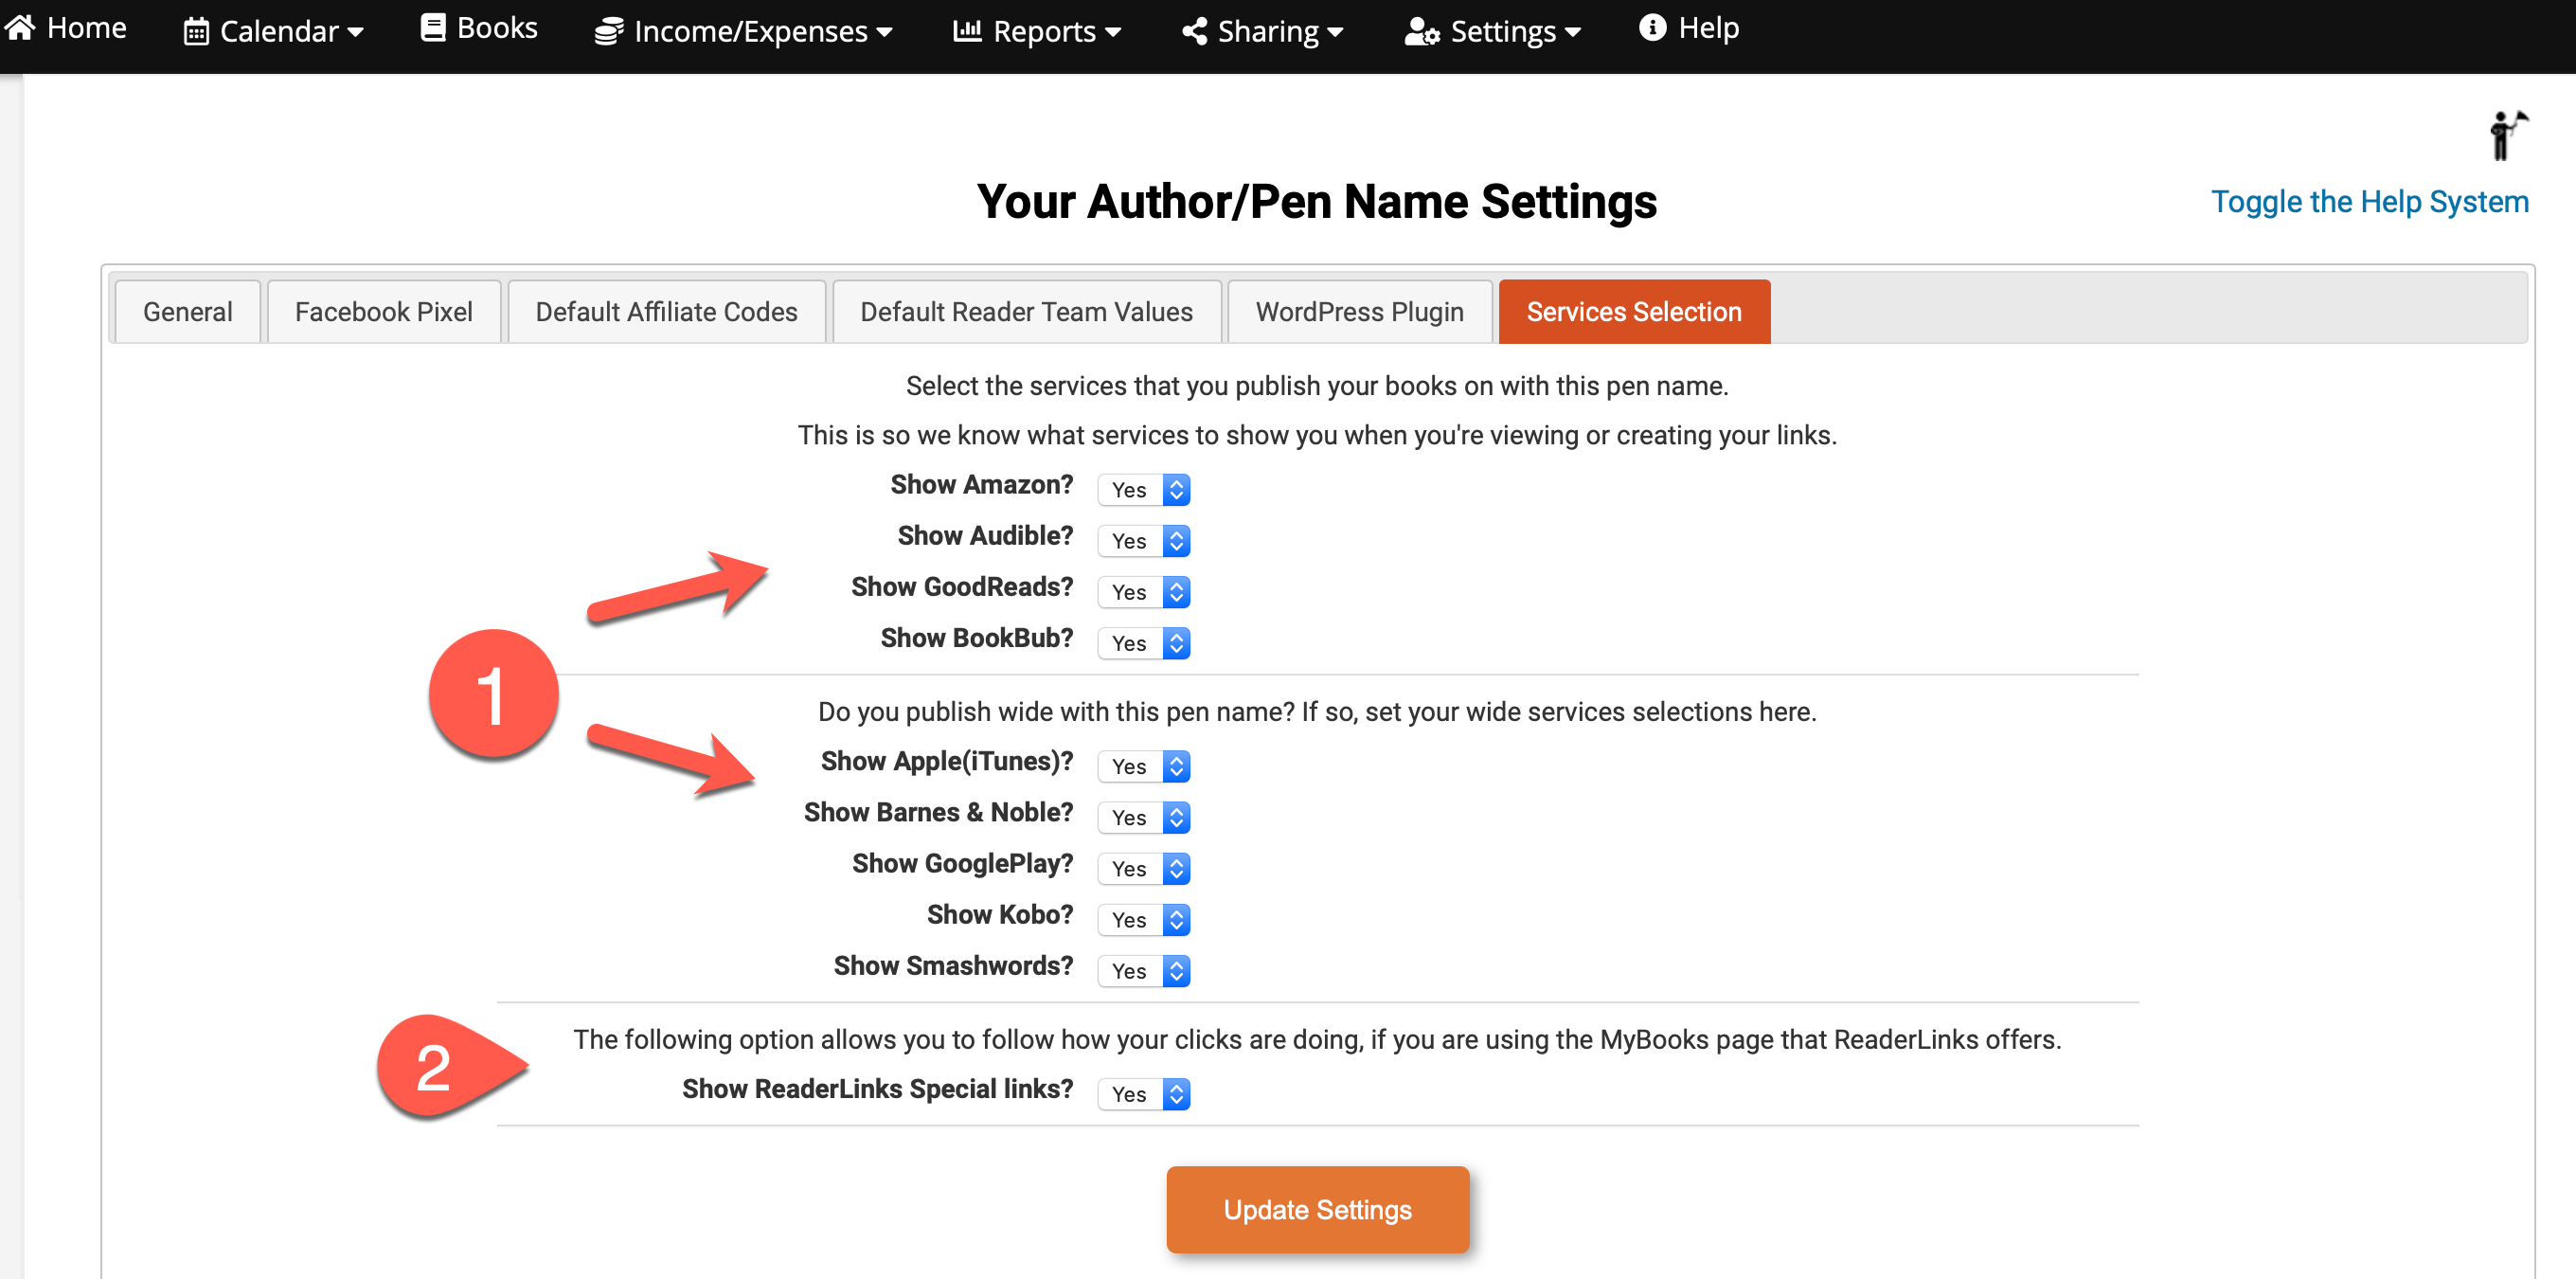
- Indicate each platform this author/pen name publishes to. When you enter your individual books, ReaderLinks will automatically generate a set of links for that book for each platform the book is published on. For example, if you publish on Amazon and Barnes and Noble, Readerlinks will generate unique links to the book sales pages, one link for Amazon and one link for Barnes & Noble.
- Selecting ‘Yes’ allows you to view the number of clicks on your links if you are using the MyBooks page of Readerlinks.
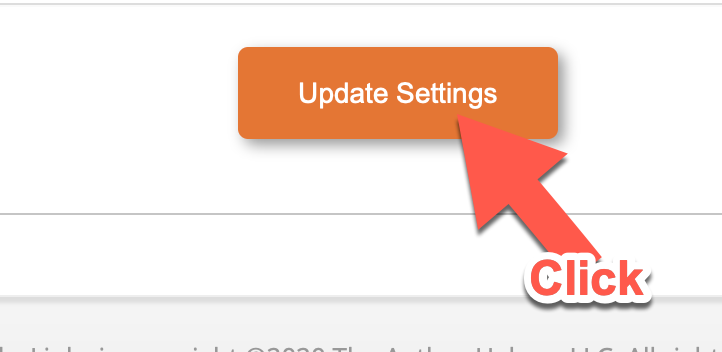
8. Click update to save your settings.
9. Click the pen name icon in the upper right hand corner of your browser.
10. Click add new pen name account.

11. Repeat steps 1-8 for each author/pen name you publish under. You’re allowed three pen names per account.
NOTE: It’s important to set up all of your pen names BEFORE going on to import your sales data! When you import your sales data the first time, you’ll be asked to assign each book to its proper pen name. This is a one-time step.
Go back to Step One for help entering your new pen name.
IMPORTANT: In the import process, you’ll be able to assign sales data to specific pen names as long as the pen names already exist in Readerlinks. If you haven’t set up all of your pen names, in Step 8 you’ll be able to exclude data from books that belong to the missing pen names. You can always add those pen names later and then repeat this process to import the sales data for those names.
1. Open your KDP Dashboard and click Reports.

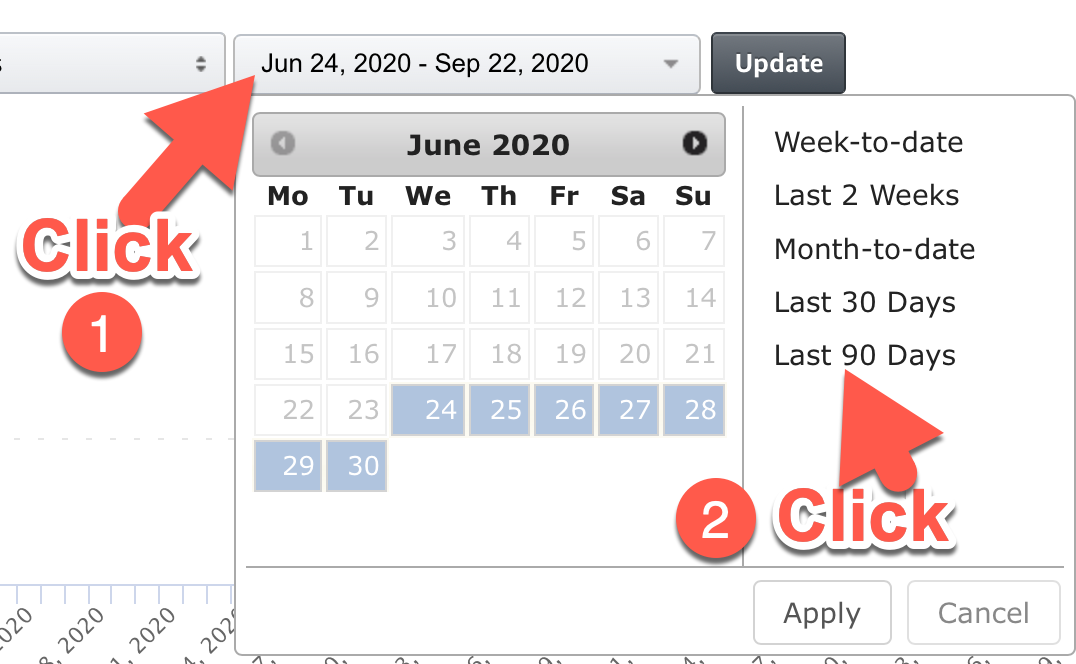
2. Set the report range to 90 Days.
3. Scroll down and click Generate Report.

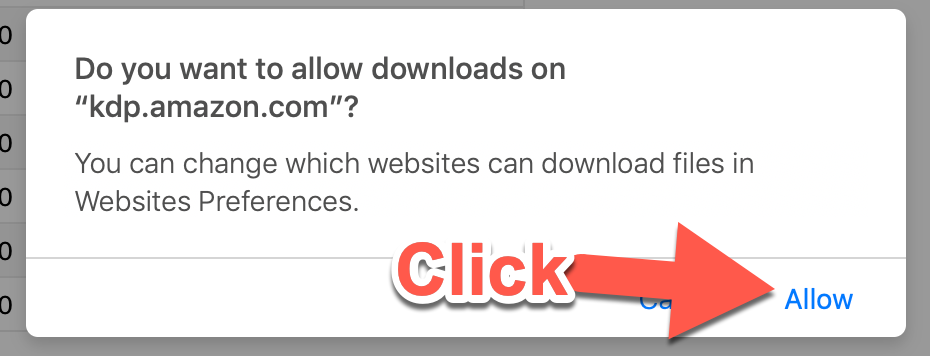
4. Click Allow to download your KDP report to your device.
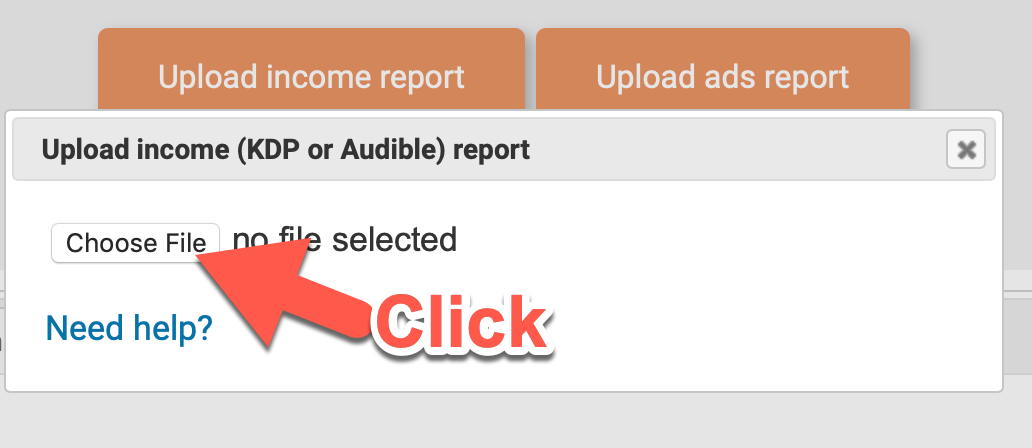
5. From the ReaderLinks home screen, click the Upload Income Report button.

6. Click the Choose File button and select your downloaded KDP report file.
7. Click on the Show New Books link on the popup window.
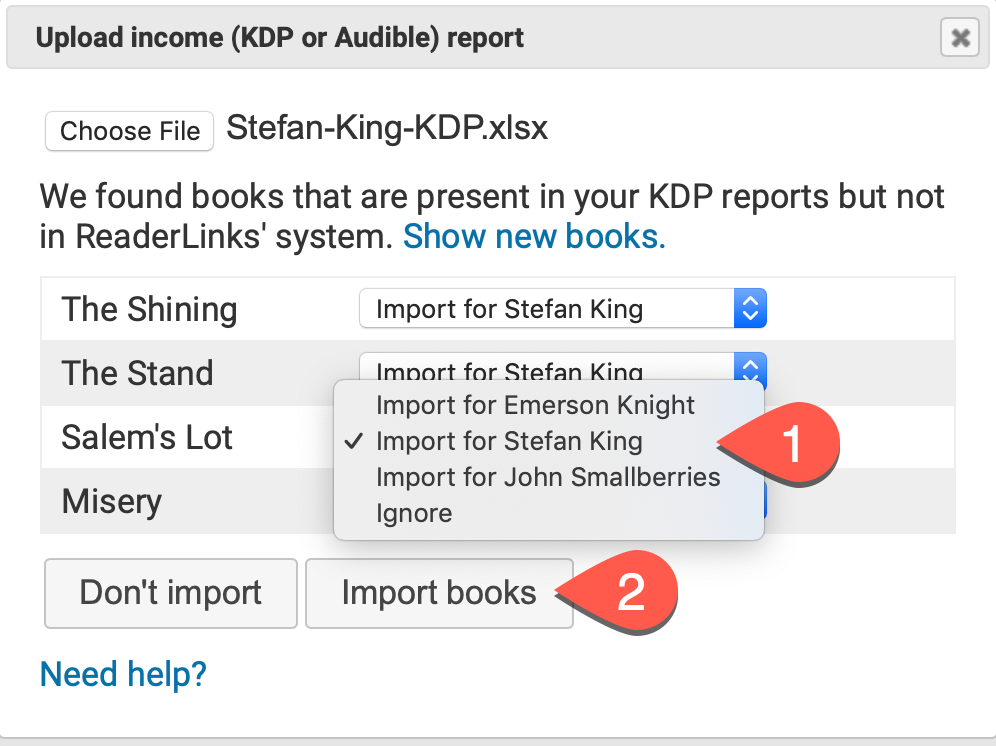
- Assign each book shown to the correct pen name in the drop down menu, or select ignore to exclude a book from the import. You should select ignore for each book that does not have a pen name in Readerlinks. After you create the pen name, you can repeat the import process.
-
Review your selections carefully. You won’t be able to undo the import if you assign a book to the wrong pen name.
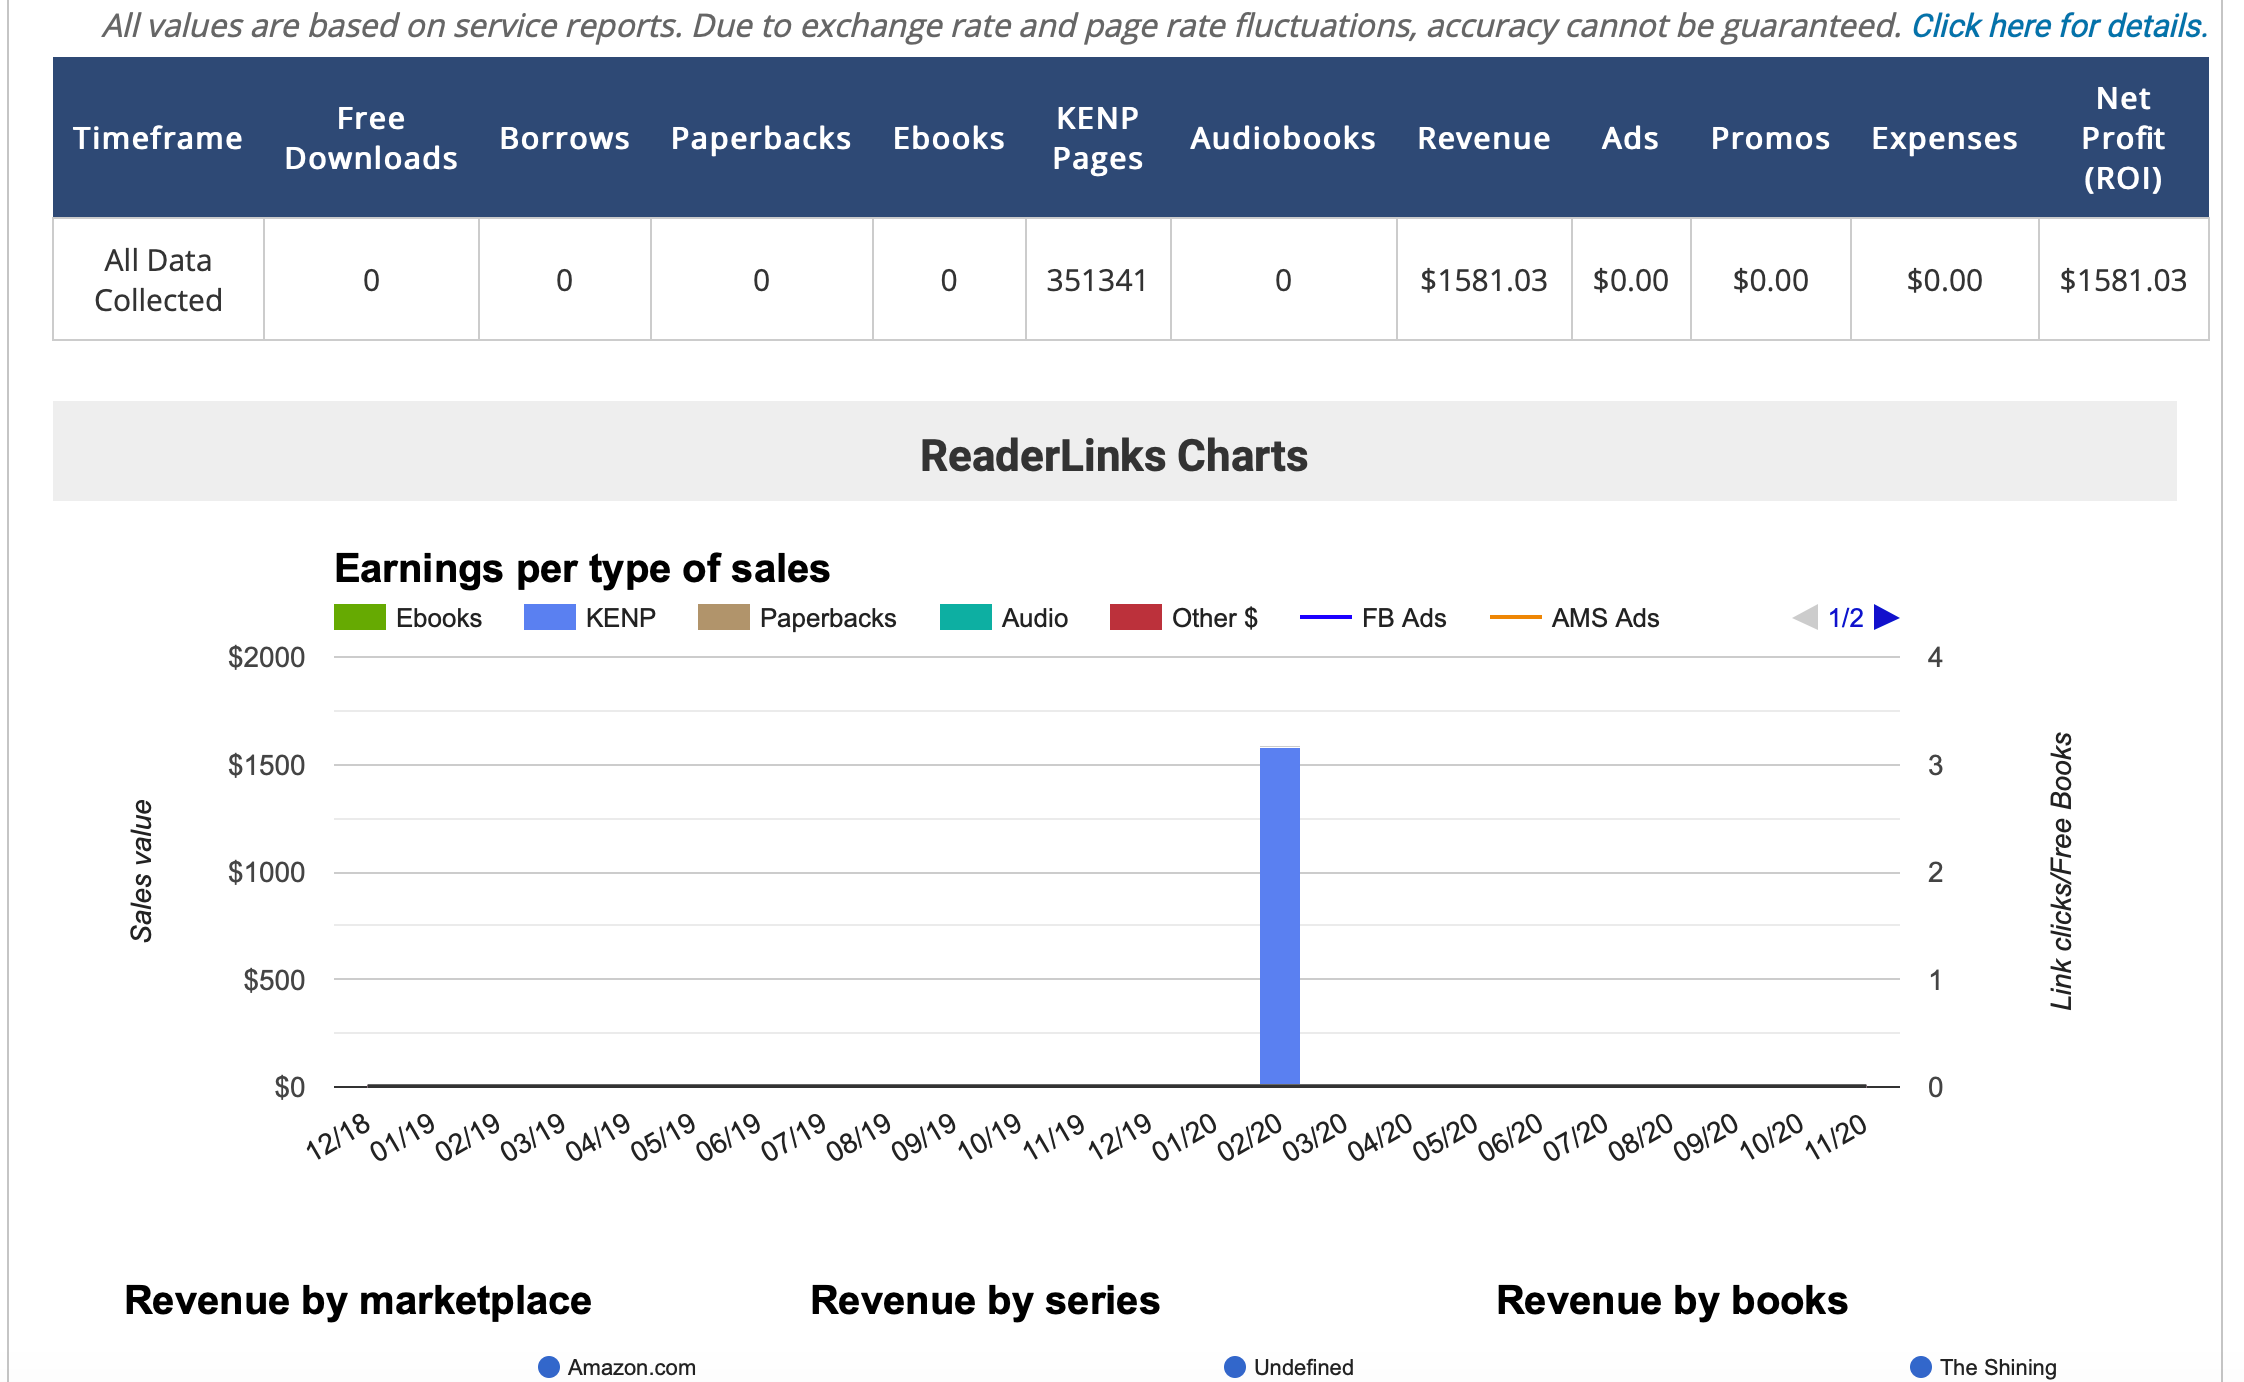
8. From the Home screen, you can scroll down to view the books you added along with your sales reports. These reports will be explained in detail later. [LINK TO BE ADDED]
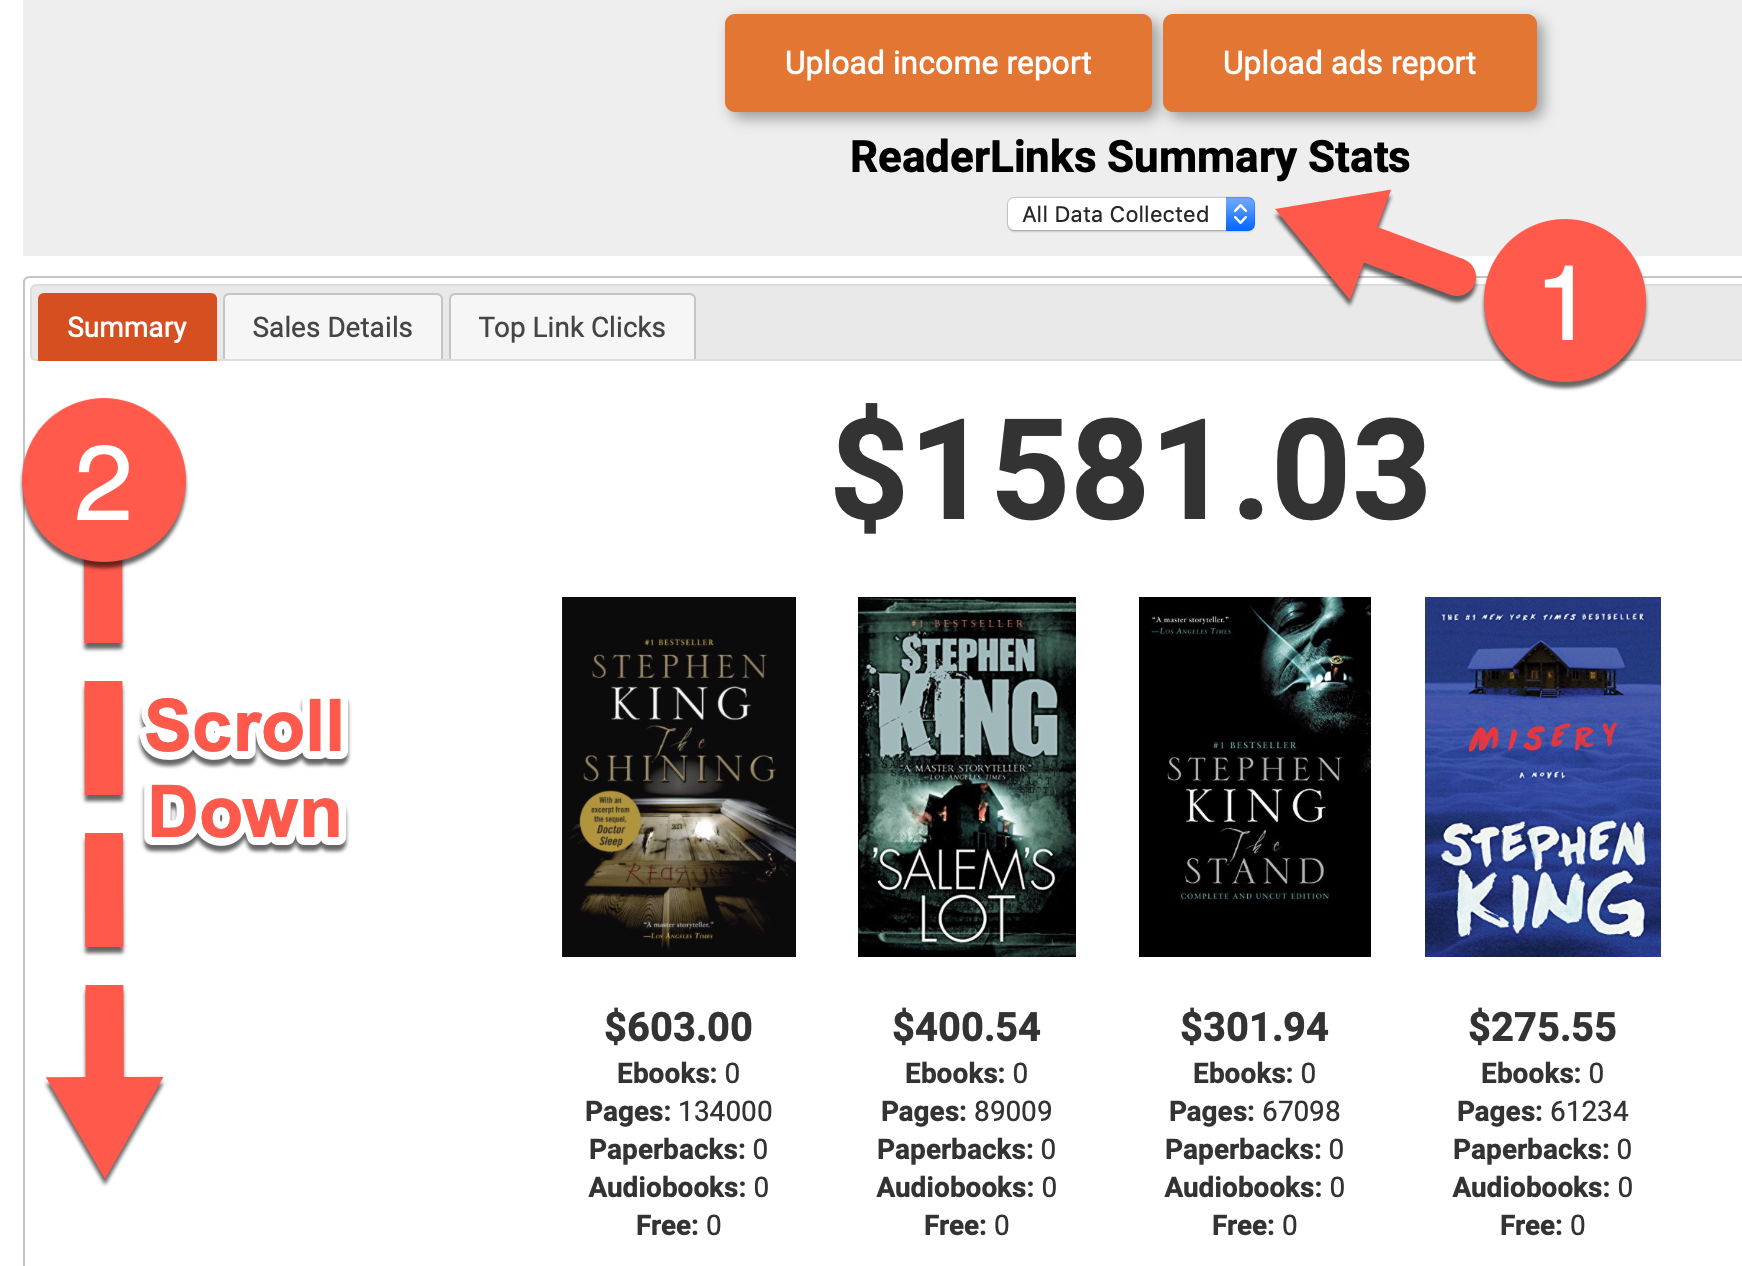
- Select a date range.
- Scroll down to view more reporting data.
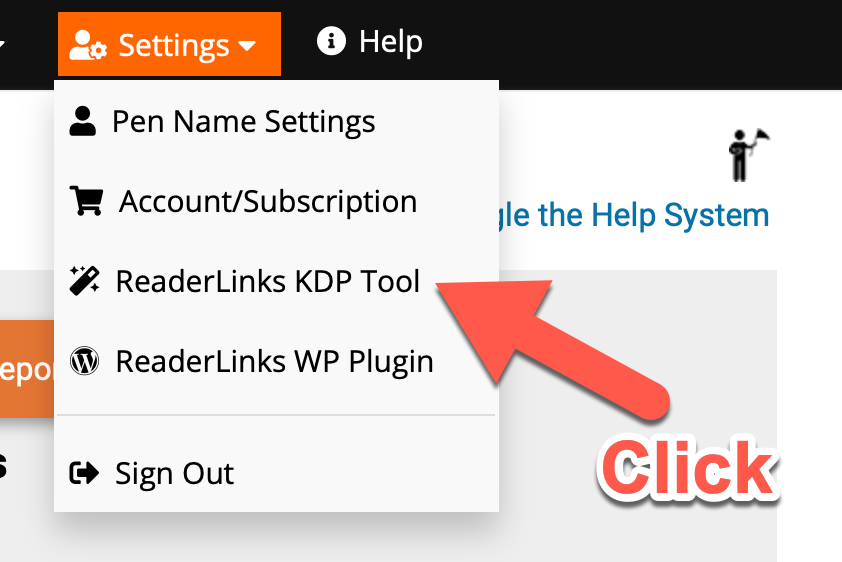
The KDP Bookmarklet allows your web browser to pull sales data at regular intervals from KDP. From the settings menu, click the ReaderLinks KDP Tool.
NOTE: If you have a version of the ReaderLinks KDP bookmarklet already installed, please remove that before installing the new one.
The bookmarklet will only capture KDP sales data. At this time, there is no bookmarklet available to live capture sales data from non-Amazon platforms. Click here to learn how to manually enter non-Amazon sales data.
Follow the steps below to install your KDP Bookmarklet.
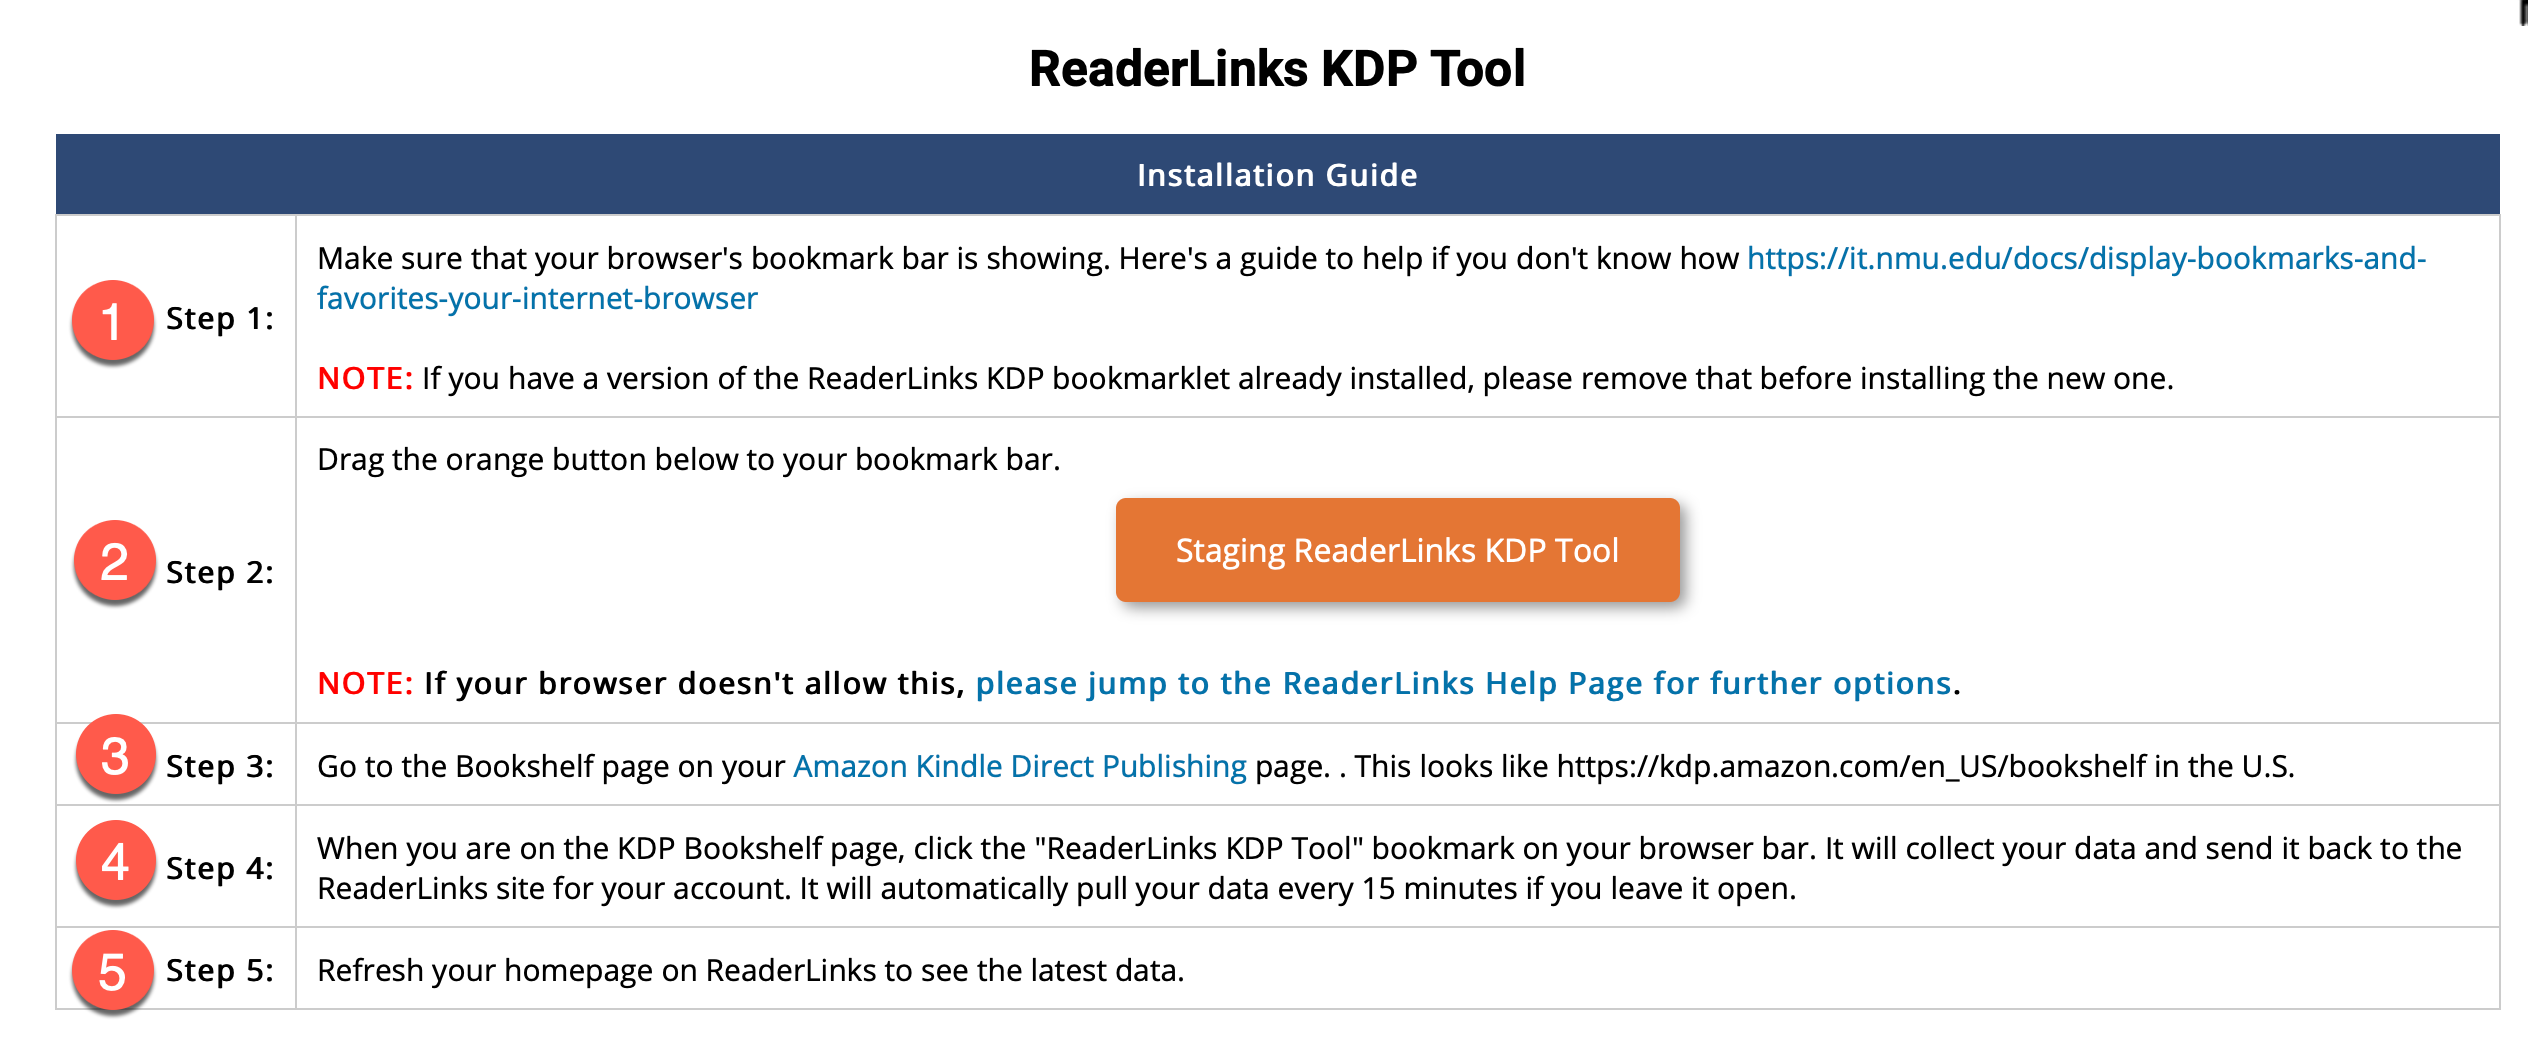
1. Make sure that your browser’s bookmark bar is showing.
Here’s a guide to help if you don’t know how https://it.nmu.edu/docs/display-bookmarks-and-favorites-your-internet-browser
2. Click and drag the orange button to your bookmark bar.
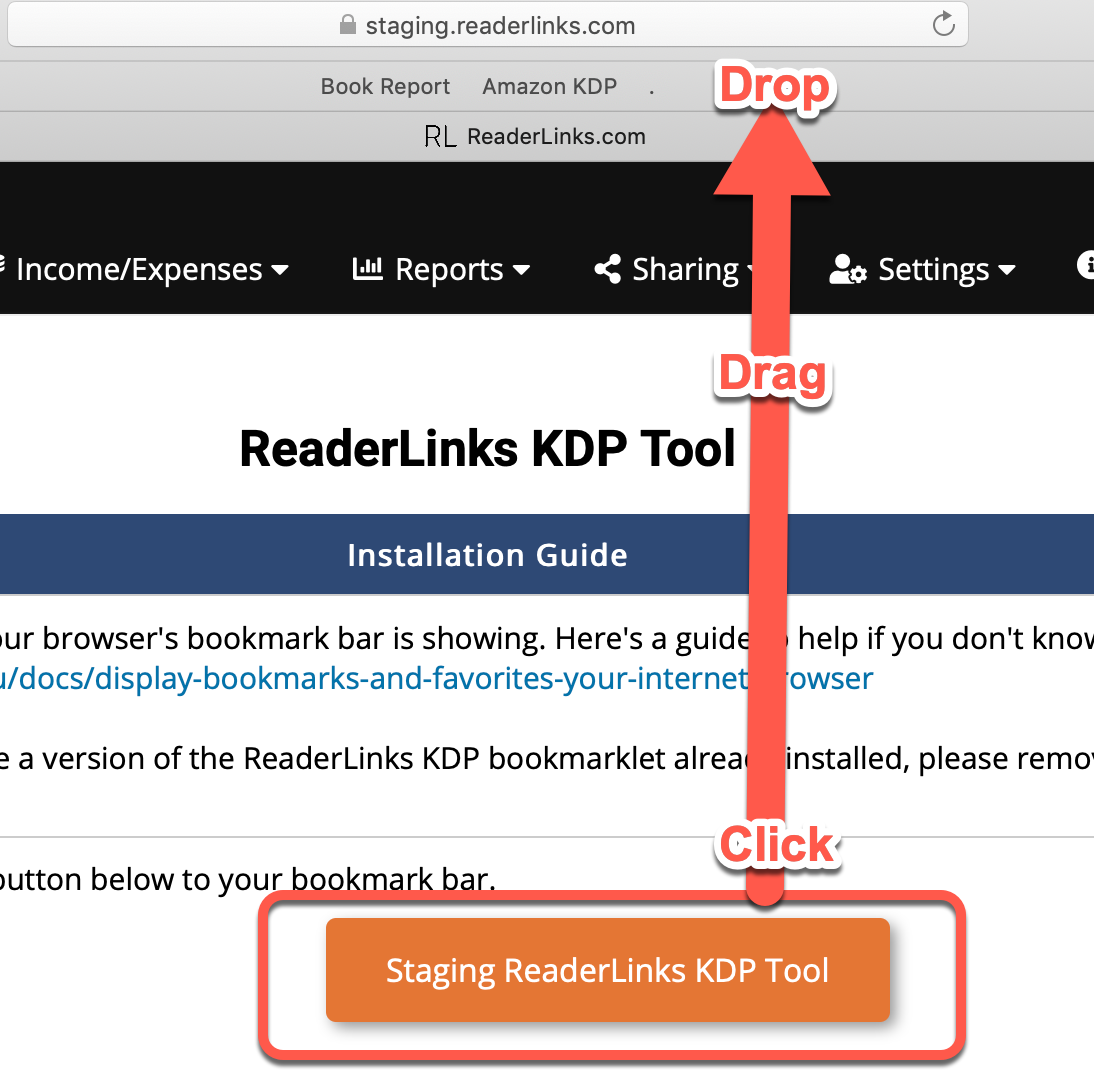
NOTE: If your browser won’t allow the above method, click here to view an alternate method specific to your browser.
3. Login into your Amazon Kindle Direct Publishing account and navigate to your Bookshelf.

4. Click the “ReaderLinks KDP Tool” bookmark on your browser bar. Your sales data will now appear in your Readerlinks sales reports.
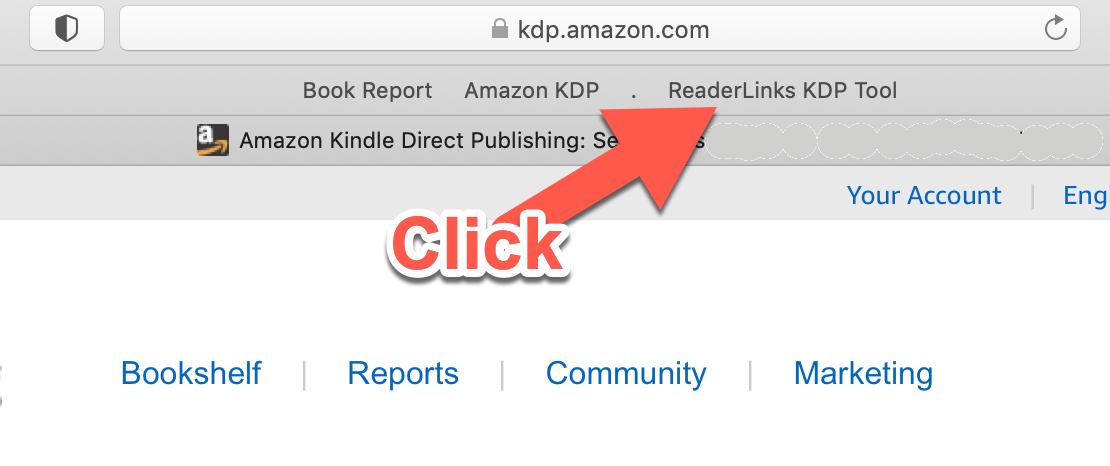
As long as the Bookshelf page is open in a tab, Readerlinks will gather your sales data from KDP every 15 minutes. You only need to click the bookmark tool once per session, but you will need to do so each time you go to your bookshelf.
Feel free to browse in another tab while the ReaderLinks KDP Tool continues to gather data for you in the background.
5. Click Home to view your updated sales information.
Add non-Amazon income you want to track in your Readerlinks reports, such as book sales from B&N, Apple, and Google Play, and merchandise sales.
While you can manually add in your KDP sales data here, it is recommended that you use the ReaderLinks KDP Tool, instead.
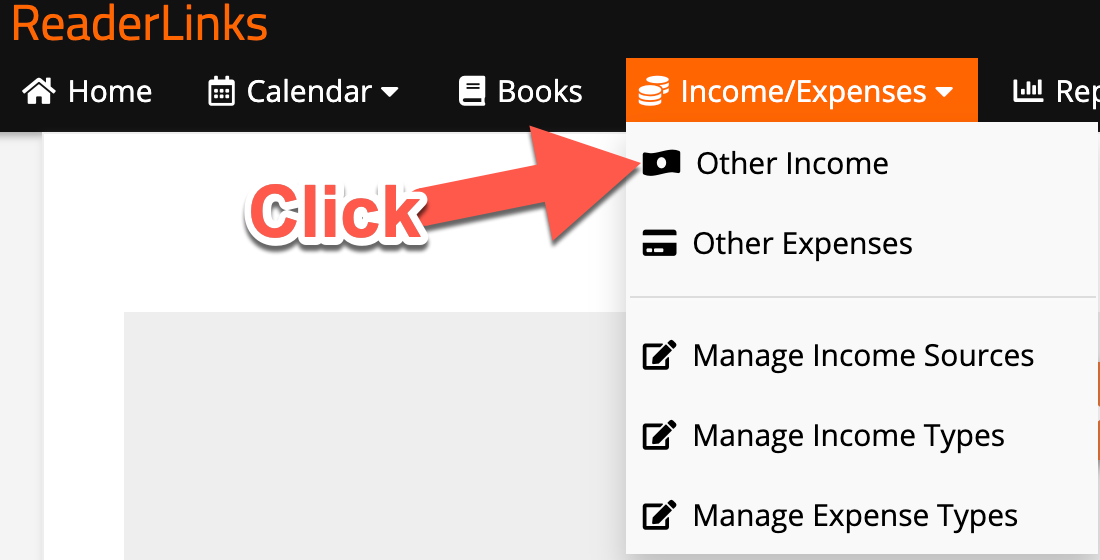
1. From the Income/Expenses menu, select Other Income.
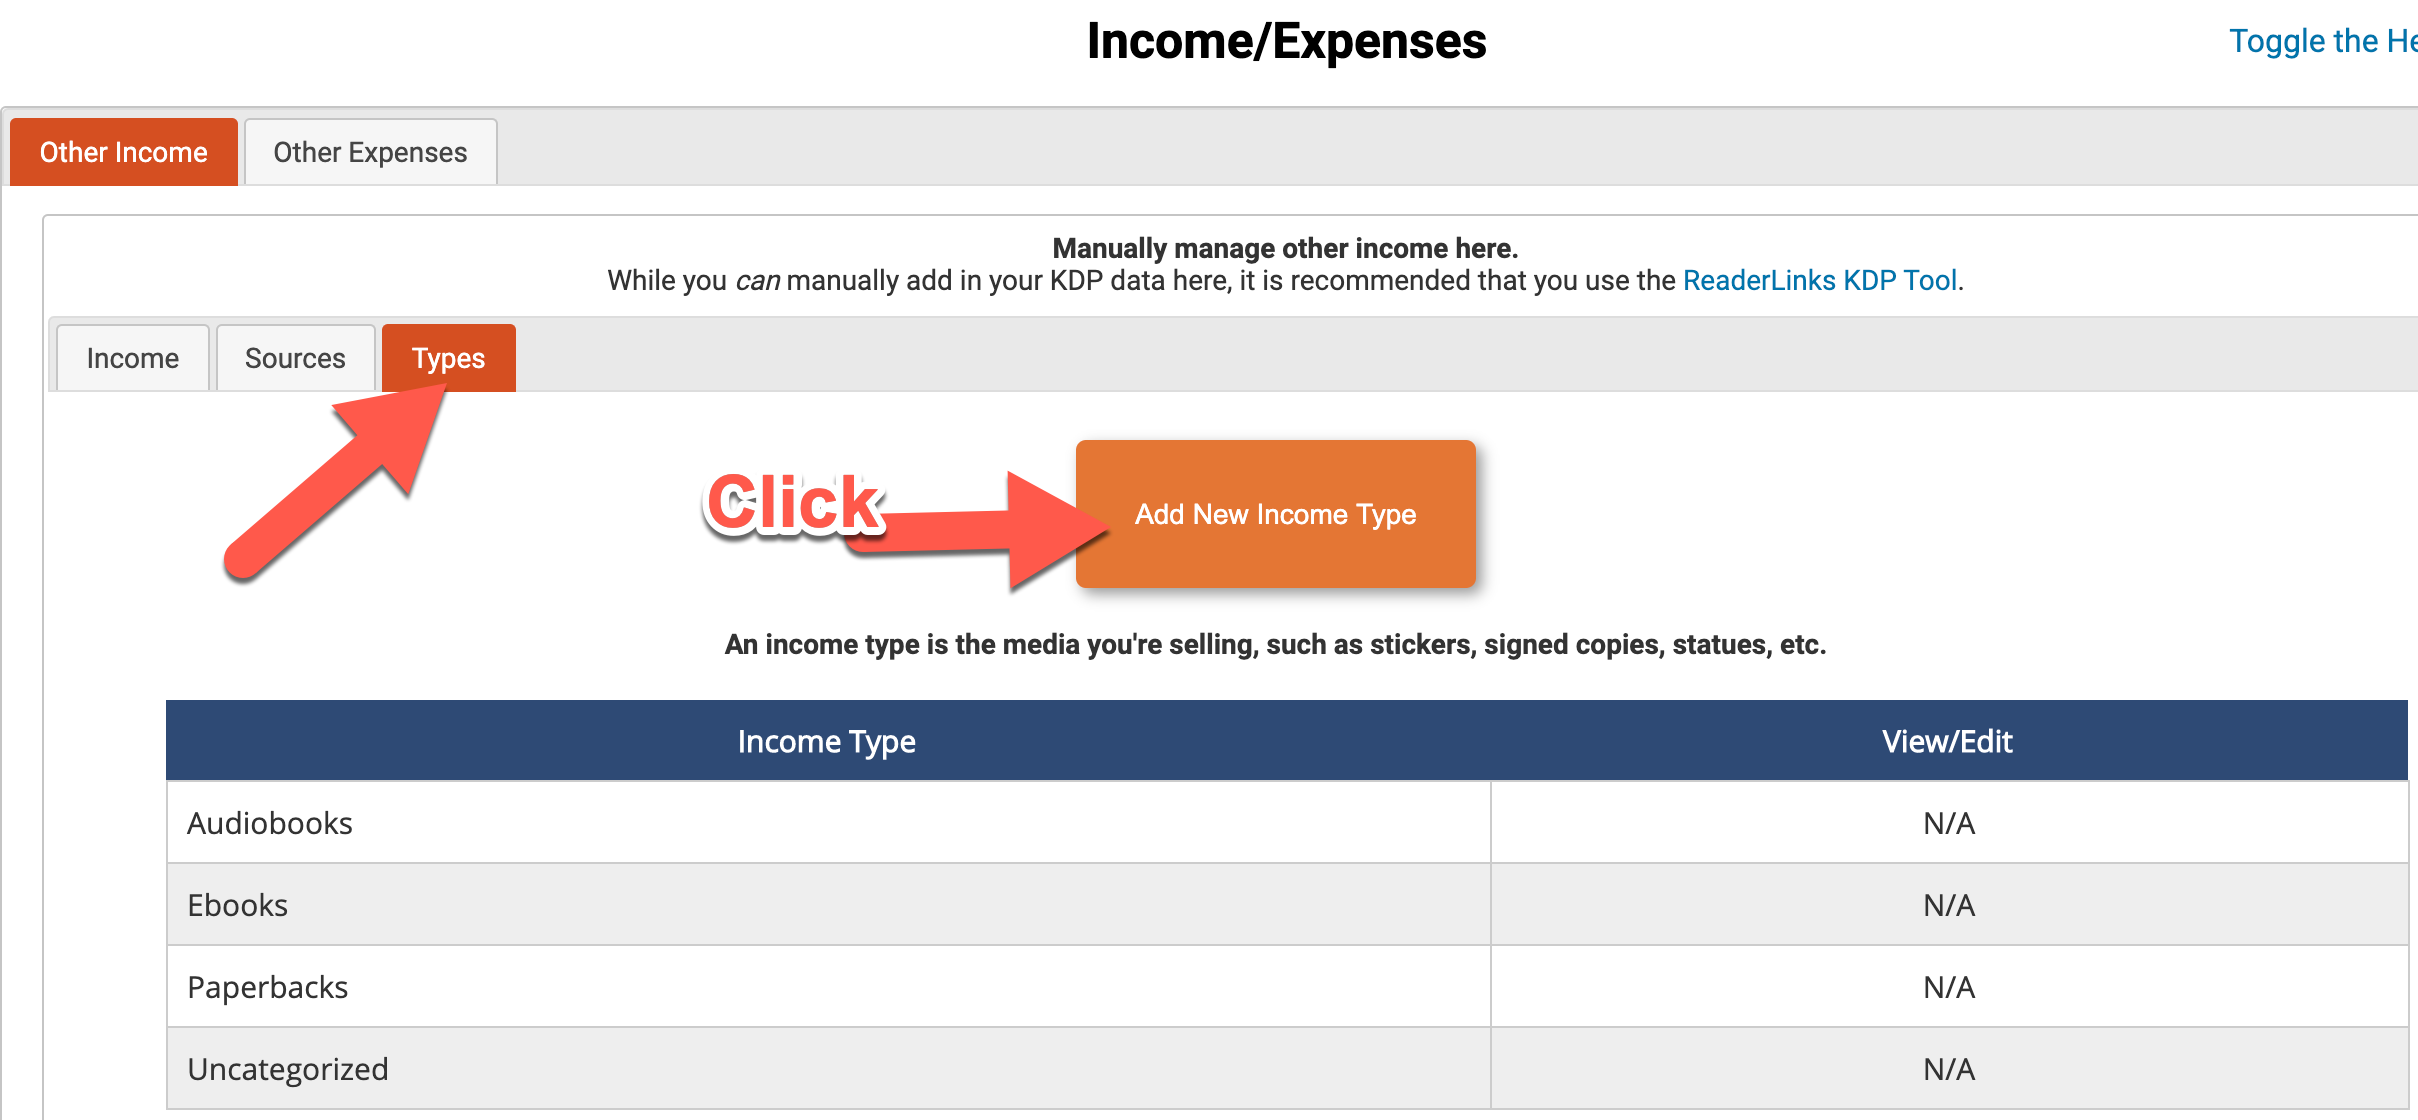
2. Under the Other Income tab, click the Types tab. There are 4 pre-defined income types.
Click Add New Income Type to create additional types. You can always add additional types later, as needed.
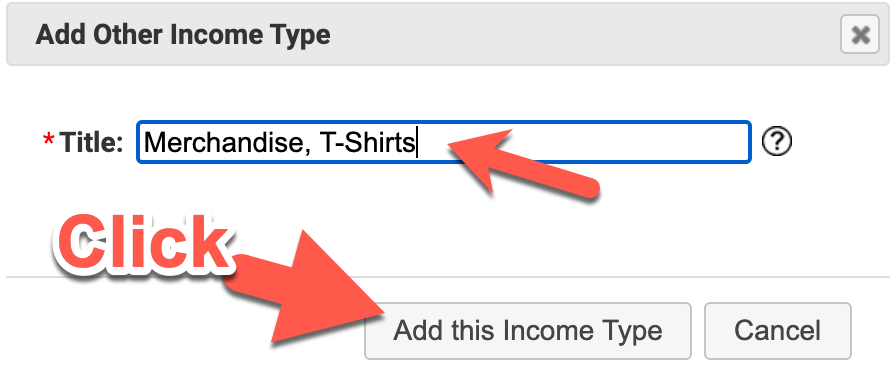
3. Give the new income type a name, then click Add This Income Type.
4. Next, click the Source Tab. The only pre-defined source is a generic catch all.
Click Add New Income Source to add other revenue sources, such as Barnes & Noble, Apple, My website, etc.
You can add additional sources at any time, as needed.
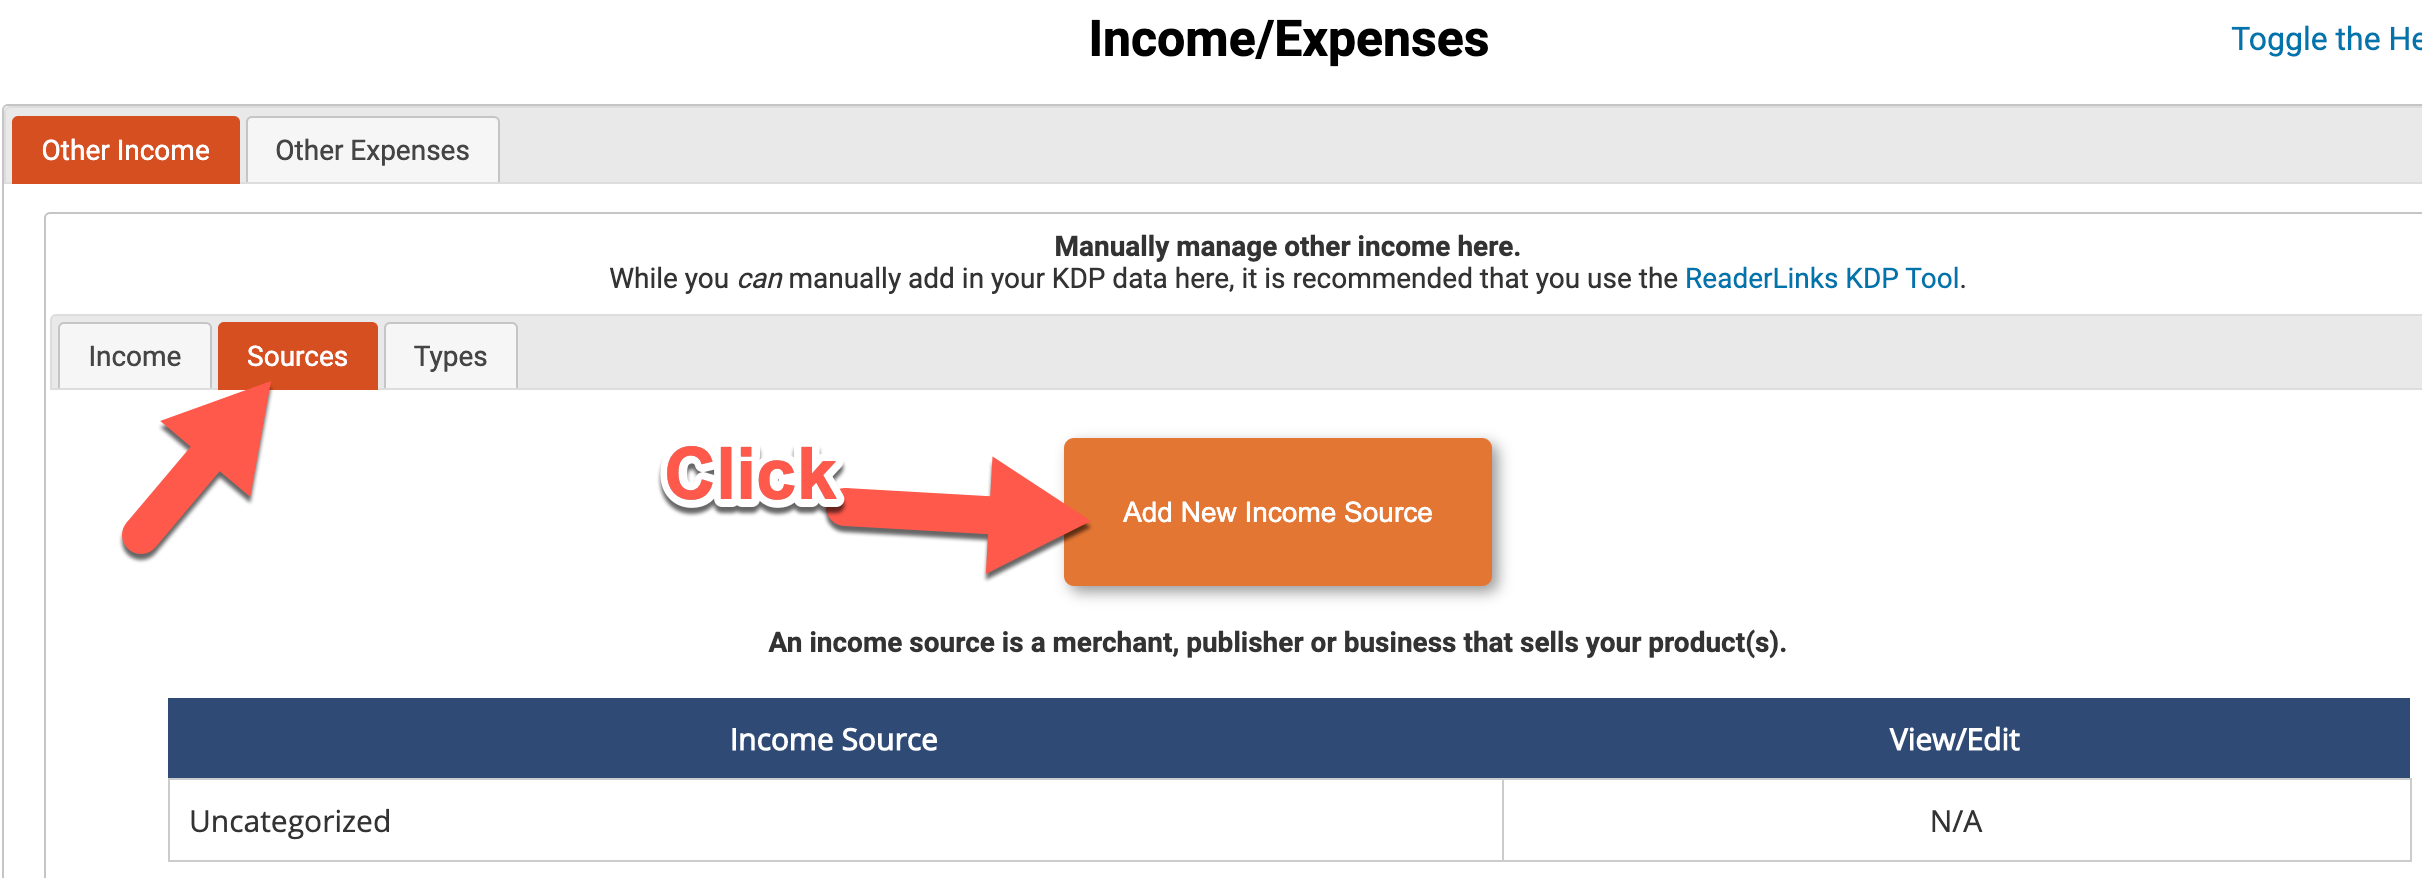
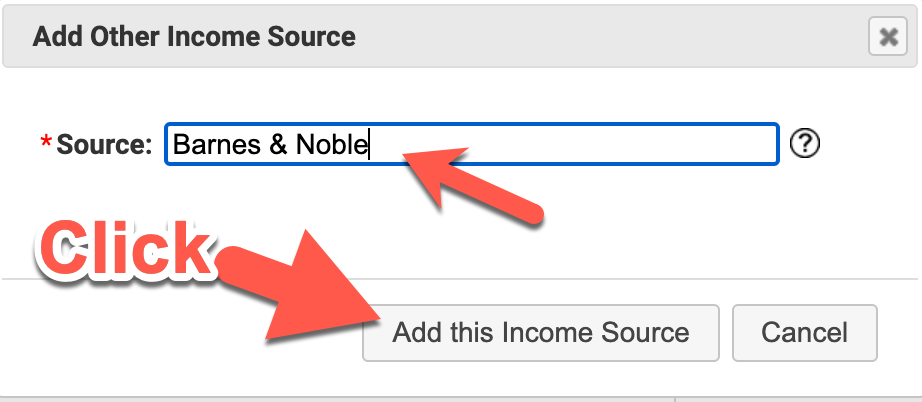
5. Give the new source a name, then click Add This Income Source.
6. Click the income tab to record sales.
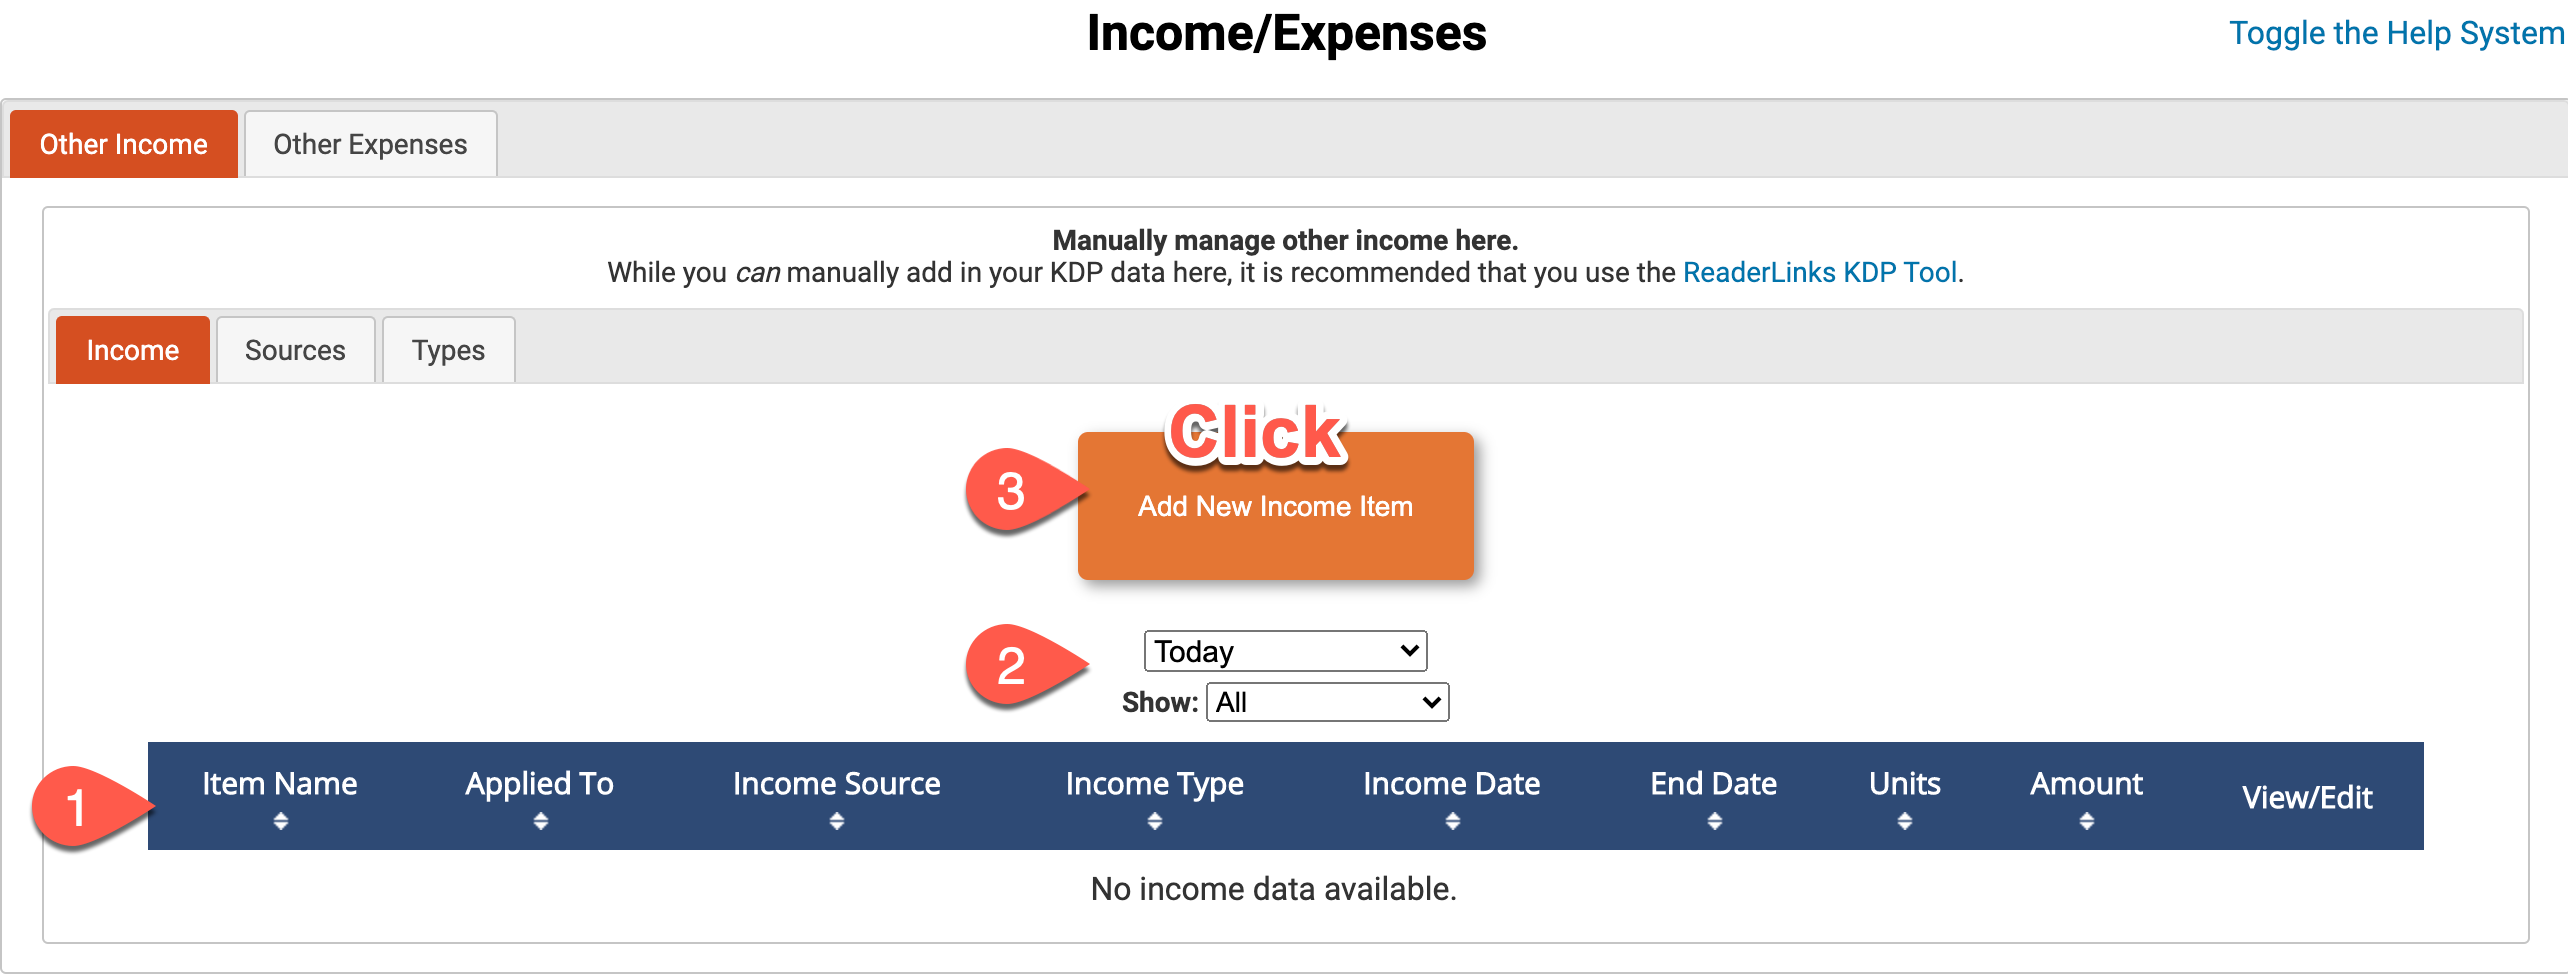
- View and edit previous income entries here.
- Select a date range for the income entries you wish to view or edit.
- Click Add New Income Item to record new income.
7. Enter the amount, source, and type for your income Item.

- Enter a name for your revenue item.
- Select a type of revenue and source from the drop down options. These are the sources and types you created in the previous steps. If needed, go back and create the source and type.
- Enter the units sold and total revenue.
- Enter the start and end date for your sales
- Click Add This Item to complete your entry.


